Use this program to:
See also
Creating a Lower Surface Model, a 2D Isopach, or a 3D Isopach for a Selected Lithotype
Feature Level: RockWorks Standard and higher
Menu Options
Step-by-Step Summary
If you've selected Use Existing Model, the program will load the information from the existing lithology model (.RwMod file), and will proceed to surface extraction and diagram generation.
If you've selected Create New Model, the program will scan the project database and extract the borehole locations, lithology depths and materials, and any borehole orientation. It will apply any source data filters you have requested, and will interpolate the solid lithology model, coding the lithotypes the numeric value declared in the Lithology Types Table. The completed model will be stored on disk under the indicated file name.
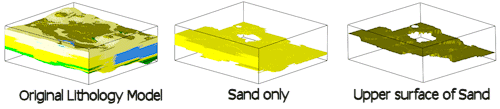
Once the new model is created or the existing model loaded, Rockworks will then determine the uppermost elevation for the requested material in each vertical column of nodes in the input lithology model. That elevation will be stored in the corresponding node in the output grid model. Any locations for which there are no occurrences of the selected material, a null value will be assigned in the output grid.
If requested, the program will create a 2D and/or 3D image representing the grid model. The requested diagram(s) will be displayed in a RockPlot2D tab and/or RockPlot3D tab in the Options window.
![]() Back to Lithology Menu Summary
Back to Lithology Menu Summary
![]()