RockWorks | Borehole Operations | Stratigraphy | Grids -> 3D Strat Diagram
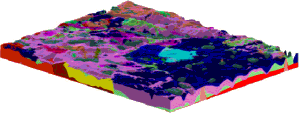
This program creates a 3D layered stratigraphy diagram based on a list of existing grid models that represent the top ("superface") and base ("subface") of each unit. These are RockWorks grid models (RwGrd files) that must already exist on your computer. The formation names grid model names, and colors are read from the RockWorks Datasheet.
This program is designed for two types of applications:
- Users who have created their grid models within other applications (e.g. ModFlow, Surfer), have imported the models into a RockWorks format, and wish to use RockWorks to create stratigraphic (or hydrostratigraphic) diagrams.
- Users who have created their grid models within the Borehole Manager portion of RockWorks but need more flexibility in dealing with stratigraphic relationships (e.g. special manipulations with the grids).
This is a "manual" way of creating the kind of stratigraphic diagram that is available in the Borehole Operations Stratigraphy | Layered Model program.
See also
Exploded Stratigraphy Diagrams from existing grid models
Stratigraphy Quadrant Diagrams from existing grid models
Feature Level: RockWorks Basic and higher
Menu Options
Step-by-Step Summary
- Rules & Filters: Use the tabs at the top of the window to apply filters and rules for this program. (More info)
- Spatial Filter: Filter the input data to be displayed in striplogs, if activated.
- Time Filter: Filter any T-Data or Aquifer data in striplogs, if activated.
- Stratigraphic Rules: Apply stratigraphy rules for stratigraphic logs (if activated).
- 3D Log Design
If you decide to include logs with your stratigraphy model ("Striplogs" setting, below), click on this button at the top of the window to set up how you want the 3D logs to look.
- Visible Items: Use the check-boxes in the first pane to select which log items are to be displayed. See Visible Item Summary for information about the different log items.
- Options: Click on any of the Visible Items names to see the item's settings in the Options pane to the right. See the Visible Item Summary for links to the Options settings.
- Layout Preview: For each item you've activated, you'll see a preview cartoon in the upper pane. Click and drag any item to the left or right to rearrange the log columns. See Using the 3D Log Designer.
-
- Input
Click on this tab to define the columns in the RockWorks Datasheet which contain the necessary input.
- Title: Select the name of the column in the datasheet that lists the formation titles as they will be displayed in RockPlot3D.
- Superface: Select the name of the column that lists the names of the grid files (.RwGrd) that represent each unit’s upper surface.
- Subface: Select the column that lists the name of the grid files (.RwGrd) that represent each unit’s lower surface.
- Color: Select the column that displays the color in which the unit is to be represented in the stratigraphic diagram.
- Other 3D Diagram Options
Use these checkboxes to append other layers to your 3D scene.
Click each tab to set up the 3D diagram layers (striplogs, images, infrastructure, legends, reference cage, etc.).
! If you are including Striplogs, be sure to click on the 3D Log Design button at the top of the window to define the log appearance.
- Output Options
- Save Output File: Check this to assign a name for the 3D scene in advance, rather than displaying it as Untitled.
- Automatic: Choose this option to have RockWorks assign the name automatically. It will use the name of the current program plus a numeric suffix, plus the ".Rw3D" file name extension.
- Manual: Choose this option to type in a name of your own for this RockPlot3D file.
- Display Output: Check this option to have the resulting scene displayed in RockPlot3D once it is created.
-
This program requires that two or more RockWorks-format grid models already exist.
- Access the RockWorks Datasheet program tab.
- Open or create a "gridlist" data file that lists the names of the grid models (.RwGrd) representing the upper and lower surfaces of each unit, the titles for the units, and their color.
- If you want to include a legend to the stratigraphic names, be sure the formations are listed in the current project's Stratigraphy Types table.
- Select the Borehole Operations | Stratigraphy | Grids -> 3D Strat Diagram menu option.
- Enter the requested program settings, described above.
- Click the Continue button to proceed.
The program will build a 3D stratigraphic diagram from the bottom up, using the indicated grid models. Additional layers will be appended, as requested. The completed diagram will be displayed in a RockPlot3D tab in the Options window, if requested.
- You can adjust any of the settings in the Options pane and click the Continue button again to regenerate the diagram.
- View / save / manipulate / print / export the image in the RockPlot3D window.
 Back to Stratigraphy Menu Summary

RockWare home page