RockWorks | Graphics | Images | Image -> Map
Use this program to import a single raster image into a RockPlot2D window. This is the same tool as RockPlot2D's Import Raster option.
See also: Plotting multiple raster images in RockPlot2D
Menu Options
Step-by-Step Summary
- Image Name & Location: Click this tab to establish the image details.
- Project Image: Click this button to plot the currently-defined Project Image. (More info)
- Other Image: Choose this option to plot a different image, and click on the tab to set up the image details.
- File Name: Click here to browse for the Image to be displayed in RockPlot2D.
- Image Location Defined By: You have several options for entering the coordinates at which the raster image is to be displayed in RockPlot2D:
- Project Dimensions: Choose this option if the current project dimensions represent the border coordinates for the image you've selected.
- World File: Choose this option if there is an accompanying World File which defines the image extents and click this tab to define the file.
- Automatic: Choose this option if the program is to search automatically for a World File with the same file name as the Image File, above, and with either world file name extensions: *.bmpw or *.bpw (italicized letters are replaced by the extension characters of the Image File, as in *.pngw or *.pgw, etc.)
- Manual: Choose this option to browse for the World file to be used for georeferencing the selected image.
- Manually Specified: Click in this radio button if you want to type in the X and Y coordinates for each bitmap corner.
- X-Minimum: Enter the X (Easting) coordinate represented along the western edge of the image.
- X-Maximum: Enter the X (Easting) coordinate represented along the eastern edge of the image.
- Y-Minimum: Enter the Y (Northing) coordinate represented along the southern edge of the image.
- Y-Maximum: Enter the Y (Northing) coordinate represented along the northern edge of the image.
- 2D Map Options
Use these checkboxes to append other layers to your map.
Click each tab to set up the 2D map layers (map peripherals, map border, etc.).
- Output Options
- Save Output File: Check this to assign a name for the map in advance, rather than displaying it as Untitled.
- Automatic: Choose this option to have RockWorks assign the name automatically. It will use the name of the current program plus a numeric suffix, plus the ".Rw2D" file name extension.
- Manual: Choose this option to type in a name of your own for this file.
- Display Output: Check this option to have the resulting map displayed in RockPlot2D once it is created.
- Select the Graphics | Images | Image -> Map menu option.
- Enter the requested menu settings, described above.
- Click the Process button to proceed.
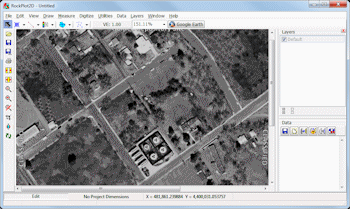
RockWorks will read the indicated raster file name and reference coordinates, and display the image in a RockPlot2D tab in the Options window.
- You can adjust any of the diagram options in the pane to the left and then click the Process button again to regenerate the image.
- View / save / manipulate / export / print the map in the RockPlot2D window.
 Back to Images Menu Summary

RockWare home page