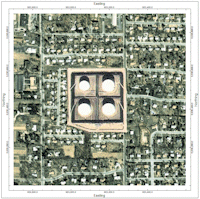
The Background Image layer is offered in most RockWorks map windows. It is used to specify a raster image to be used as the background for the other map layers. This can be a nifty way to plot contours or map symbols on top of a scanned road map, an aerial photo, etc. This tool requires that the bitmap image already exists, stored in the current project folder in a BMP, JPG, EMF/WMF, PCX, PNG, TGA and TIF format. Georeferencing the image can be done by manually entering the coordinates, with a World File, or with the project dimensions.
! This tool does not create bitmap images.
 Background Image
- Project Image
Use this option if you have a Project Image defined under Project Settings and wish to display that image in this map.
- Other Image
Choose this option if you wish to use a different image as background for this map.
- File Name: Click on the small button to browse for the name of the image file to be displayed behind the other map layers. The supported formats are listed above.
- Image Location Defined By...: You have several options for entering the coordinates at which the bitmap is to be displayed. This is required because bitmaps are not stored with any kind of global coordinate information.
- Project Dimensions: Choose this option if the current project dimensions represent the border coordinates for the image you've selected.
- World File: Choose this option if there is an accompanying World File which defines the image extents.
- Automatic: Choose this option if the program is to search automatically for a World file with the same file name as the Image File, above, and with either world file name extensions: *.bmpw or *.bpw (italicized letters are replaced by the extension characters of the Image File, as in *.pngw or *.pgw, etc.)
- Manually Select: Choose this option to specify the name for the World file.
- World File: Click to browse for the World file to be used for georeferencing the selected image.
- Manually Specified: Click in this radio button if you want to type in the X and Y coordinates for each bitmap corner.
! RockWorks assumes that these coordinates match the coordinate system and units defined in the Dimensions pane.
- X-Minimum: Enter the X (Easting) coordinate represented along the western edge of the image.
- X-Maximum: Enter the X (Easting) coordinate represented along the eastern edge of the image.
- Y-Minimum: Enter the Y (Northing) coordinate represented along the southern edge of the image.
- Y-Maximum: Enter the Y (Northing) coordinate represented along the northern edge of the image.

RockWare home page