By default, RockWorks uses a large "LandBase" database of Public Land Survey System reference coordinates, for use in spotting Range, Township, Section well locations, and for creating land grid section and lease maps. This LandBase is available at no charge to RockWorks users, and can be downloaded via the program's Help | Downloads menu. (It is large - comprised of 8 files, 360 MB in size - so it is not installed with the main RockWorks program.) Please refer to the discsussion of the RockWare LandBase for more details.
However, if you have commercial land grid data that you wish to use instead - perhaps for areas not covered by the LandBase or where the Townships are complicated or very irregular in shape - you can import that data into a "Land Grid Table", make any editing changes you deem necessary, then create your own custom look-up files for use in RockWorks. This functionality is available in RockWorks Advanced only.
! There are three main steps to this process: Import the data, edit if you wish, then create the 8 custom library files.
- Import the external data.
- Be sure you have your source data handy:
- Commercial land grid file (purchased from a third-party company).
- RockWare LandBase: If you plan to create a library which is a subset of the large LandBase, be sure you have downloaded this large library, as described under the RockWare LandBase link above.
- Exported land grid: If you've previously imported data and saved it in a text format, you can import that back into the Land Grid Table.
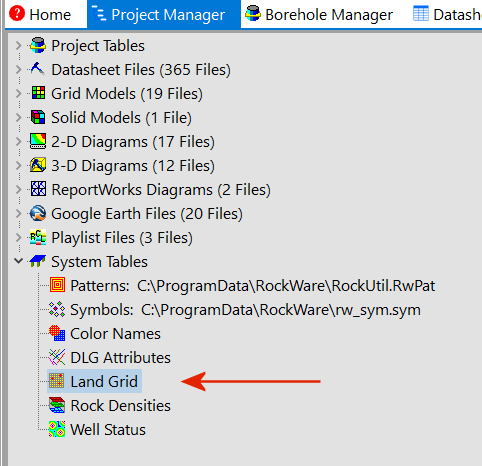
- Open the Land Grid table by expanding the System Tables heading in the Project Manager program tab, and double-clicking on the Land Grid Table item.
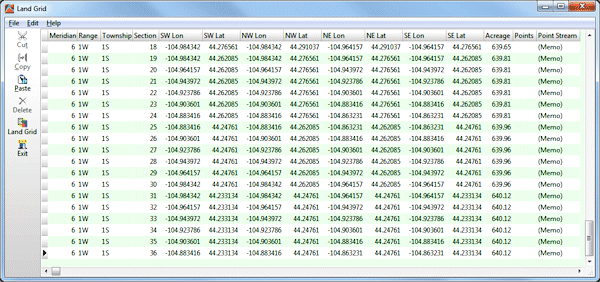
- You may see existing data listed here (the LandGrid Table is shipped with sample data for a Township in Colorado). The table lists Meridian, Range, Township, Section, longitude and latitude coordinates for the section corners, and acreage. You can double-click on the (Memo) field to see the actual section vertex listing (if it has more than 4 vertices).
- In the table editor, select one of the following options:
- File | Import | Commercial Land Grid Data to import data from an external source. (See Importing Commercial Land Grid Data for details.)
- File | Export to export the current listing to a text file.
- File | Import to import a listing of coordinates which has been exported to a text file.
- Edit the Data: Once the data is imported and listed in the format shown above, you can:
- Edit the data as you like.
- Import additional data sets, appending them onto this listing.
- General Notes:
- Each row contains data for a single Section.
- The Sections do not need to be listed in any particular order.
- If Sections are missing from Township, they simply will not be plotted on the final map.
- No blank cells are permitted. If there is data missing for a particular Section, the entire row should be removed.
- Column Specifics:
- Column 1: Contains the number representing the Principal Meridian for the land grid survey. This table can list surveys that span more than one Principal Meridian, however if you use this to create a section map, note that you can generate a map of only one meridian at a time.
- Column 2: Contains the Range number, immediately followed by an "E" for "East" or "W" for "West."
- Column 3: Contains the Township number, immediately followed by an "S" for "South" or "N" for "North."
- Column 4: Contains the Section number, which is listed as an integer value from 1 to 36.
- Columns 5-6: Contain the longitude and latitude coordinates for the southwest corner of the Section.
- Columns 7-8: Contain the longitude and latitude coordinates for the northwest corner of the Section.
- Columns 9-10: Contain the longitude and latitude coordinates for the northeast corner of the Section.
- Columns 11-12: Contain the longitude and latitude coordinates for the southeast corner of the Section.
- Column 13: Contains the computed acres for the section. This value is computed automatically by the program when you import commercial land grids.
- Columns 14 and 15: Optional. If you imported the land grid from a commercial source and if the section boundaries contain more than 4 corner points, these two optional columns may be filled with values.
- The "Points" column defines the number of additional section perimeter points defined for the section.
- The "Point Stream" column links to a Memo field where these lon/lat coordinate pairs are listed. (See IMPORTANT NOTE below.)
- Create the Land Grid Libraries.
- When the land grid data is displayed to your satisfaction, click on the Land Grid button along the left side of the window. This final step is necessary to actually create the Land Grid library files in the structure that RockWorks can use.
- Use RockWare's Land Grid Table: Choose this option if you want the program to use the default RockWare LandBase.
- Use Imported Land Grid Files: Choose this option if you want the program to use this new data that you have imported, and you are ready to create the look-up libraries.
- Folder for generated Land Grid Files: Click the small button on the right side of the prompt to browse for the location where the 8 land grid reference files will be created.
! Because you can specify where these files reside, you can maintain multiple libraries.
- Click the Generate Files button to create the 8 reference files.
! IMPORTANT NOTE: There is a distinction in how RockWorks will use the four "standard" corner points (columns 5-12), and the "stream" points in column 15.
- The four corner points will be used when plotting township boundaries in section maps (Utilities | Map | Section Map) and when spotting wells (using any of the coordinate conversion tools). If you imported commercial land grid data that has more points defined for a Section, this program will pick the four best points possible to use for corners.
- The Points and Point Stream columns will be used when plotting section boundaries in section maps.

RockWare home page