RockWorks | ModOps | Grid | Math | Thickness -> Mass
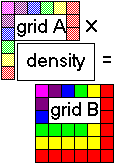
Use this program to multiply the grid cell volume (cell-width * cell-height * Z-value, thickness) by a constant (representing density per unit volume) to create a new "mass" grid.
Example: Let's say you have a grid model that represents the thickness of particular formation, and you want to determine total mass. First, you must be sure the thickness units match the X and Y coordinate units. Then, determine the density per volume unit of the rock type in question (the program does offer some samples). Then, run the thickness grid through this conversion to determine total mass. Each node represents total mass of that grid cell. Determining total mass of the grid model can be determined by running the output grid file through Grid | Statistics | Report and reading the "Sum of all node values" computation.
This tool differs from the Model & Constant Math tool because this utility multiplies the cell volume (cell width * cell height * thickness value) by the constant while that tool multiplies the Z-values only by a constant.
! The Z-values of the input grid must represent thickness, and the thickness units must be the same as the X and Y coordinate units in order to compute a meaningful volume.
- You can use the tools in the Coords menu to translate X and Y coordinates to different units.
- You can use the Datasheet | Edit | Columns | Math | Column & Column command to subtract one elevation column in the datasheet from another, resulting in a third column of thickness values. These can then be gridded using the Grid | Create | XYZ - Grid program.
Menu Options
Step-by-Step Summary
- Grid Name
- Input Grid (Thickness Grid): Click to the right to browse for the name of the existing grid file (.RwGrd) whose nodes represent thickness values to be processed by this program.
- Output Grid (Mass-Per-Cell Grid): Click to the right to enter the name to assign to the new grid file that the program will create, which will contain the converted density values.
- Conversion
- Density Conversion Factor: Click to enter the real number value to which each grid cell’s volume is to be multiplied. This value should represent the density of the rock type whose thickness is modeled in the input grid file, per unit volume. You can refer to the Rock Density Table for some sample rock densities, or to How to Measure Your Rock Density for more information about that.
- 2D Grid Map
Check this box to display the output grid as a 2D map at this time.
Click this tab to set up the 2D map layers (bitmap, symbols, labels, line contours, color-filled contours, labeled cells, map border, etc.).
- 3D Grid Diagram
Check this box to display the output grid as a 3D surface at this time.
Click this tab to set up the 3D map layers (surface colors, images, reference cage, etc.).
! You can request both a 2D and 3D representation of the grid model.
- Be sure you have a RockWorks grid model (.RwGrd file) already created, for input into this program, and that its node values represent thickness in the same units as the X and Y location coordinates.
- Select the ModOps | Grid | Math | Thickness -> Mass menu option.
- Enter the requested settings, described above.
- Click the Process button to proceed.
The program will load the input grid file, compute the volume of each grid cell, and then multiply each cell’s volume by the entered Density Conversion Factor. The resulting mass values will be stored in a new grid file on disk under the output file name you selected.
The requested diagram(s) will be displayed in a RockPlot2D tab and/or RockPlot3D tab in the Options window.
- You can adjust any of the settings in the Options window and then click the Process button again to regenerate the diagram(s).
- View / save / manipulate / export / print the diagram in the RockPlot2D or RockPlot3D window.
Tip: The Sum of All Node Values that is shown in the statistics report represents the total mass.
 Back to Grid Menu Summary

RockWare home page