Use this program to:
See also: 2D Google Earth Strike & Dip Maps.
Menu Options
Step-by-Step Summary
! Click the Example button at the top of the window to load a sample file that is installed with the program.
This example illustrates the sample file "\Documents\RockWorks Data\Samples\StrikeDip_3D_Advanced_01.rwDat"
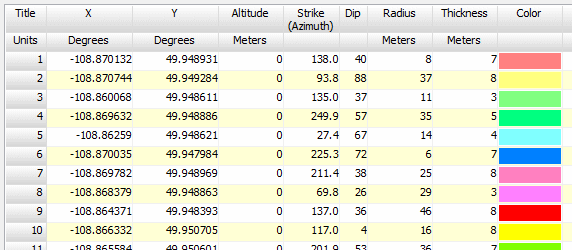
Longitude and latitude coordinates must be in decimal format. If you're using another coordinate system, be sure you've specified the Units and the Projection Settings as appropriate.
Strike direction or dip direction must be entered in a 0 - 360 degree azimuth format. (If you need to convert quadrant notations to azimuth, please refer to the Quadrant -> Azimuth tool in the Utilities.)
Dip angle must be entered as positive values from horizontal.
Radius and thickness values can represent the units you define here.
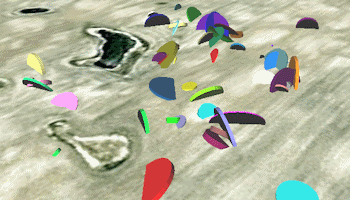
The program will create a KML file listing the disks at the point locations, using the color and size you've specified in the datasheet. It will create a KMZ (zip) file containing the KML file using the file naming scheme you selected
The resulting map will be displayed in Google Earth, if requested.
![]() Back to Planes Menu Summary
Back to Planes Menu Summary
"Google" is a trademark of Google Inc.
![]()