RockPlot2D | Draw | Line Types | Polygon
Use the Polygon menu command or toolbar button to draw a closed polygon on an existing RockPlot2D image. The polygon can be filled or un-filled.
Step-by-Step Summary
Options
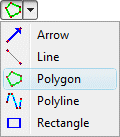
- Select the Draw | Line Types | Polygon menu item, or click on the Draw | Polygon button at the top of the screen
 .
.
The Polygon button is available in the Draw | Line Types drop-down menu.
The program will be in "Draw Polygon" mode, as noted at the bottom of the screen.
- Position the pointer in the graphic window where one vertex of the polygon is to be placed, and click the left mouse button.
(See the Snap options described below.)
- Drag the cursor in any direction and the line will be drawn between the starting point and the current cursor position.
- Click the left mouse button to insert the next vertex.
- Drag and click as above to draw additional vertices.
- Double-click the mouse button to terminate the polygon.
- To turn off the Draw Polygon mode, click the Draw Polygon X button at the bottom of the window, or press the Shift+Escape keys, or click the arrow button
 .
.
- To snap the polygon vertices:
- Hold down the Ctrl key while drawing to snap the next vertex to any location on the nearest line.
- Hold down the Shift key while drawing to snap the next vertex to the nearest vertex on the nearest object.
- Hold down both the Ctrl + Shift keys while drawing to snap the next vertex to the nearest Smart Snap point.
- To edit the polygon's characteristics (color, style, fill, etc.):
- Click the Edit button at the top of the window
- Double-click on the polygon, or right-click on it and choose Properties.
- Adjust the polygon's settings. See Polygon Attributes for information.
- To edit the position of any of the polygon's vertices:
- Click the Edit button at the top of the window
- Right-click on the polygon and choose Edit Vertices.
- Follow the instructions outlined under Editing Vertices.
- To save the polygon to a Polygon table, for use in filtering grid and solid models:
- Click the Edit button at the top of the window
- Right-click on the polygon and choose Copy to Polygon table.
- Enter the name for this particular polygon and click OK.
 Back to Drawing Tools

RockWare home page