RockPlot2D polylines (such as contour lines) and polygons (such as cross section panel blocks) can be repositioned and edited like all other graphic entities.
In addition, the vertices along the polylines and polygons can be moved, added, and deleted following the steps below.
Follow these steps to move polyline or polygon vertices within a RockPlot2D window:
- Zoom or pan as necessary for an optimal view of the item to be edited. Activate/deactivate image layers if that helps to view the item to be edited.
- Click the Edit button in the upper toolbar.

- Position the cursor on the polyline or polygon to be edited and click on it to select it. The selected item will be displayed with handles on each corner, and handles on each vertex.
- Right-click and choose Edit Vertices from the pop-up menu. The handles will change color, and you'll see an "Edit Vertex" status button at the bottom of the plot window.
- To move a vertex:
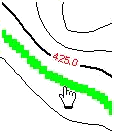
- Position the pointer on the vertex to be moved. The cursor will change shape to
 whenever it's hovering over an editable vertex.
- Left-click on the vertex and hold the mouse button down as you drag the point to its desired location; release the mouse button when the move is completed.
- You can repeat this with other vertices along the same polyline or polygon.
- To add a vertex:
- Right-click along the polyline or polygon perimeter, where you would like to insert a new vertex.
- Select the Add Vertex option from the pop-up menu.
- Reposition the new vertex as described above.
- To delete a vertex:
- Right-click on the vertex you wish to remove.
- Select the Delete Vertex option from the pop-up menu.
- When you are done editing the vertices along this line, press Shift + Esc, or click on the "Edit Vertex X" button along the bottom of the window. The item will return to regular Edit mode.

RockWare home page