![]()
How it's Used
How to Insert a Symbol Legend into a Log Design
Menu Settings
How to Reposition the Symbol Legend
How to Review the Settings
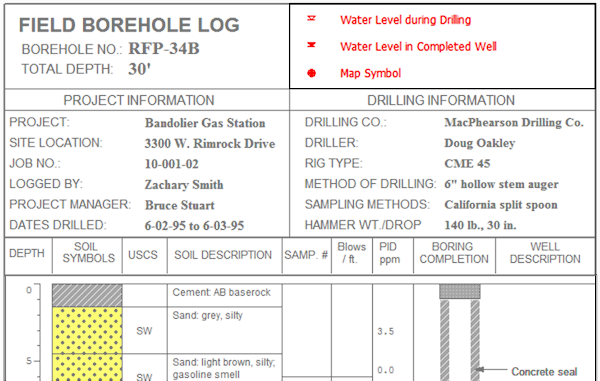
The Header/Footer Symbol Legend item is used to display user-selected symbols and text in a table-style legend in the log's header or footer.

Note that the symbols are linked to the current Symbol Table, they are not embedded statically into the design. If you change a symbol's design in the Symbol Table, or if you have selected a different Symbol Table as default, the appearance of the symbols in the legend will change.
See the Symbol item if you want to insert individual symbols.
Title: Type here a title for the legend, such as "Symbol Legend". Use the Font button to access font settings (type, size, formatting), and use the color box to select the title color.
Position: These coordinates determine the placement of the edges of the legend block in the header or footer of the log. The X coordinate represents the horizontal (left to right) placement, and the Y coordinate the vertical placement in decimal inches or centimeters relative to the top of the header or footer. The defaults reflect the location where the block was drawn (step 4 above). You may change the legend placement by editing these values, or (easier) by moving/resizing the block itself on the design screen.
Margin: These settings define the margins, in decimal inches or centimeters, inside the perimeter.
Appearance: Use these options to arrange the symbols designs and text within the legend.
Columns: Use the up- or down-arrows to increase/decrease the number of columns for placement of the symbol-label combinations. LogPlot will wrap the items as needed.
Column Margin: This represents the horizontal distance between the columns - the symbol's box and the labels, and the labels and the next symbol block; the greater the distance, the more spread out the columns will be.
Row Height: This setting determines the overall size of the symbols. As you increase the height then the width will increase proportionally.
Row Margin: This represents the vertical distance between the rows. The greater the distance, the more spread out the rows will be.
Font: Use this button to define the font style and size for the labels in the legend.
Color: Use this button to choose the font color for the labels.
Symbol Items: This is the pane where you will list the symbols and their labels.
Adding/Deleting Symbols
+ Click this button to display the Select Symbol window. Click on a symbol to select it, and click on the color button to select a color in which the symbol will be drawn. Click OK to close the window.
Click in the label cell (which might read "default") to type in the text to be displayed for your symbol.- Use this button to remove the currently-highlighted item from the listing.
Rearranging Symbols
^ Use the up-arrow button to move the currently-highlighted item upwards in the listing.
v Use the down-arrow button to move the currently-highlighted item downward in the listing.
Editing the Labels or Symbols
Labels: Double-click on a text item to highlight it, and type in the desired text.
Symbols: Double-click on a symbol picture to display the Select Symbol window. Select the design and color for the symbol.
Border
Outline: Check this box to display a line around the border of the legend.
Color: Click here to choose the line color for the border.
Fill: Check this box to fill the legend background with the color you choose to the right.
See: Move or Resize Header/Footer Items for information about dragging, resizing, and aligning items.
If you need to access the Setup window you can:
![]() Back to Header/Footer Item Summary
Back to Header/Footer Item Summary