![]()
How it's Used
How to Insert a Single Symbol into a Log Design
Menu Settings
How to Reposition the Symbol
How to Review the Settings
The Header/Footer Symbol button is used to insert a symbol of your choice into the log header or footer. This is typically used to illustrate symbols that will appear in the body of the log. This is a fixed design item with no corresponding data file commands.
See the Symbol Legend to create a table of symbols with text in the header or footer. See the Symbol Column for information about plotting symbols in the body of the log.
Select: To select the symbol to be displayed in the header or footer, click on the Select button in the Header Symbol Setup window. (Or, just click on the symbol picture itself in the window.) The program will display the Select Symbol window. You can select from vector or bitmap symbols.
To choose a vector symbol, click on the Vector Symbols tab to bring it to the front. To choose a bitmap symbol, click on the Bitmap Symbols tab to bring it to the front. Then simply click on one of the displayed symbols. You may use the scroll bars as necessary to view additional symbols. The symbol you have selected will be displayed in the preview box at the top of the window. The vector symbol's "index number" will be shown in the lower-left part of the window; the bitmap symbol "name" will be shown at the top. Click on the color box to select a color for the vector symbol; click on the foreground and background color boxes to choose those colors for bitmap symbols.
When you have selected the symbol and color, click on the OK button at the bottom of the Select Symbol window.
For more information about the process of viewing, selecting, and editing symbols, see Viewing and Editing Symbols.
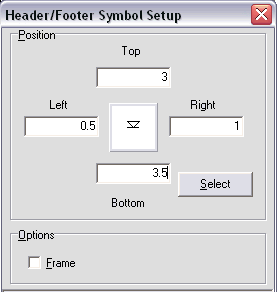
Position: Use these settings to determine the placement of the symbol.
Left, Right: These coordinates determine the horizontal placement of the left & right edges of the symbol in the header/footer of the log.
Top, Bottom: These coordinates determine the vertical placement of the top and bottom edges of the symbol.
You may change the symbol's position by editing these values, or by simply moving or resizing the item on the design screen itself, as discussed below. The horizontal and vertical coordinates are expressed in decimal inches or centimeters relative to the left and top edges of the design screen, respectively.
Frame: If you want the symbol to be enclosed in a solid-line box, insert a check in this box.
See: Move or Resize Header/Footer Items for information about dragging, resizing, and aligning items.
If you need to access the Setup window you can:
![]() Back to Header/Footer Item Summary
Back to Header/Footer Item Summary
![]()