![]()
How it's Used
How to Insert a Vertical Text Column into a Log Design
Menu Settings
How to Review the Settings
A Vertical Text column is used to plot vertical text labels within a depth interval in the body of the log.
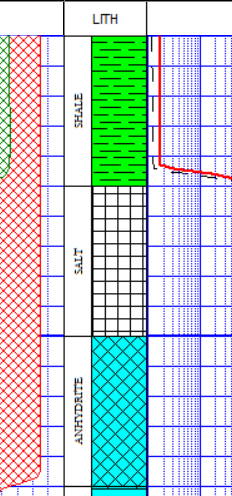
How it works: As you compile your log in LogPlot, the program will locate text listed in a Vertical Text datasheet of the same name, and plot it in the Vertical Text column at the indicated depth range. Vertical text can be used to note interpreted stratigraphic units, geologic time units, observed lithology, etc.
Alternatives: Vertical text labels in the header or footer of the log are inserted using the Static Text tool. Horizontal text listings in the log body are inserted using the Text Column or Interval Text Column tool.
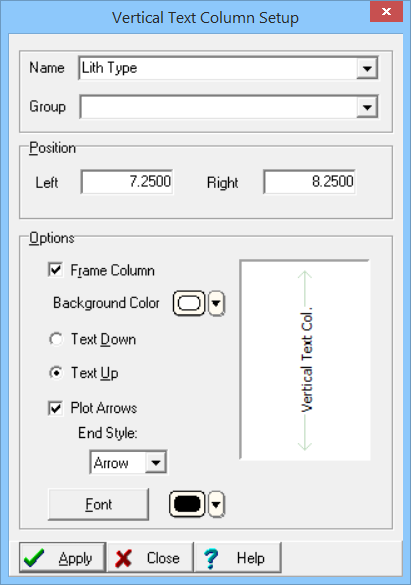
Name: The Name field is used to identify the Vertical Text column. Any data in a Vertical Text datasheet column that has the same name will be plotted in this column. The name you declare must match, character-for-character, the name for the vertical text data listed in the data file. The name match is not case-sensitive.
Group: The Group setting is optional and is used only when you create a new data file using this log design. With a Group name defined, multiple columns will be displayed on a single Vertical Text datasheet rather than in separate datasheets.
Position: These coordinates determine the horizontal placement of the Vertical Text column in the body of the log. The horizontal coordinates are expressed in decimal inches or centimeters relative to the left edge of the design screen. You may change the column's position by editing these values, or by widening/narrowing the column itself on the work screen (see Moving and Resizing Log Body Components).
Frame Column: If this box is checked, the column will be bounded by a solid-line rectangle.
Background Color: Click on the small color box to choose the fill color for the column.
Text Down, Text Up: These radio buttons are used to specify whether the text labels are to be plotted downward or upward in the column. Note the preview in the dialog box which shows examples.
Plot Arrows: Insert a check here to include arrows with the vertical text. The arrows will extend to the interval top and base.
End Style: Choose from Bars or Arrows using the drop-down list. Refer to the preview in the dialog box for examples.
Font: Use this button to establish the font type, style, size, and color to be used for the text column.
Color: Use this button to select a color for the text. This may also be selected using the Font button, above.
If you need to access the Options window you can:
![]() Back to Log Body Item Summary
Back to Log Body Item Summary
![]()