![]()
How it's Used
How to Insert Static Text into a Log Design
Menu Settings
How to Reposition the Text
How to Review the Settings
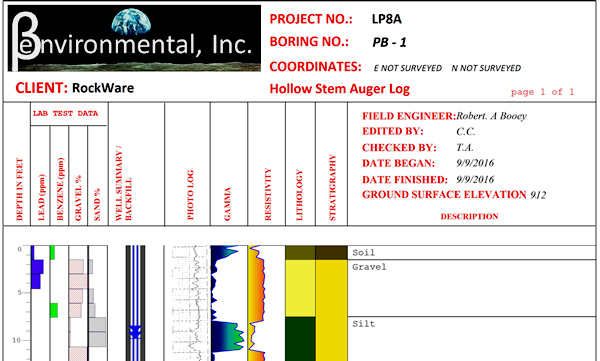
The Static Text item is used to plot textual labels in the header or footer portion of the log, specifically text that is constant from log to log. Static Text is used to label columns, to plot the unchanging log details (company name, logo), or to serve as a label for changing text entries (via the Edit Text button). It can also be used to insert automatic page numbers, well location information, and the data in the header or footer, using macros. All of the red labels in the compiled log example below are Static Text items. The labels shown in black are Edit Text entries.
This is a fixed design item with no corresponding data file commands.
Restrictions
You may include a virtually unlimited number of Static Text items in the header or footer. They can occupy a single line only - wrapping will not occur. If you need multi-line text, see Static Notes.
Example
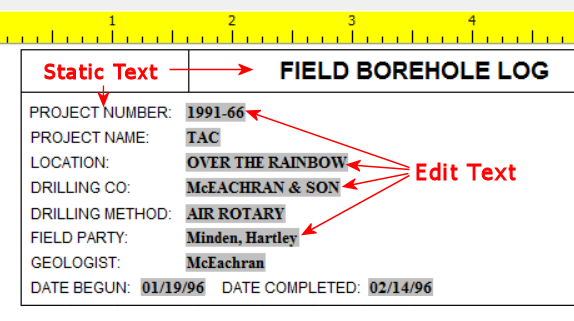
Here is a design which illustrates the use of Static Text items as labels for changing "Edit-Text Entries" discussed in another topic. In the excerpt shown below, the labels "PROJECT NUMBER:", "PROJECT NAME:", "LOCATION:", etc. are Static Text items that will remain constant each time this log is compiled with data. The accompanying text "1991-66," "TAC," "OVER THE RAINBOW," etc. are Edit Text items whose text is listed in the data file and may change each time this log format is compiled with new data.
Position: These coordinates determine the placement of the handle of the Static Text block, in the header or footer of the log. The X coordinate represents the horizontal (left to right) placement, and the Y coordinate the vertical placement in decimal inches or centimeters relative to the top of the header or footer. The defaults reflect the location where the mouse button was clicked (step 4 above). You may change the text placement by editing these values, or by moving the text itself on the design screen. See the alignment settings, below, for information about the position of the handle relative to the text label.
The coordinate units (inches or centimeters) are established under File | Page Setup.
Text: Enter the actual text to be displayed in the header or footer of the log. The Static Text label may be up to 120 characters in length. (See "Macros," below, for information about automatic plotting of page numbers, well locations, etc.)

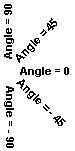
Angle: Enter the angle at which the static text label is to be plotted. The text may be plotted at any angle between 90 and -90.
Font: Use this button to access the Font dialog box, where you may set the static text label’s font type, size, and color.
Color: Use this button to change the color for the text. This can also be selected using the Font button.
Macros:
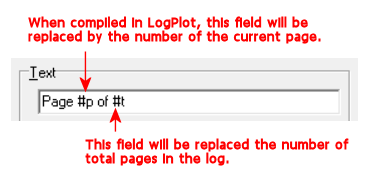
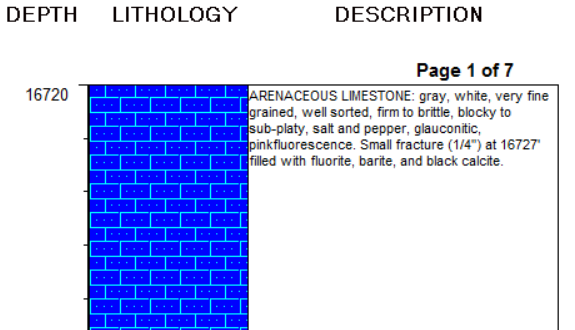
To insert the current page number and/or total number of pages in the header or footer, use the following "hot keys":
#p Inserts the current page number in the text area when compiled in LogPlot.
#t Inserts the total number of pages in the text area when compiled in LogPlot.
You can insert these hot keys as Static Text either alone or together, as well as along with regular text:
On a compiled log, this might look like this:
To insert the well location in the header or footer, use these macros:
#x Reads the Easting coordinate defined in the data file's BH Info tab, and inserts that coordinate in the text area when the log is compiled.
#y Reads the Northing coordinate defined in the data file's BH Info tab, and inserts that coordinate in the text area when the log is compiled.
#z Reads the Elevation value defined in the data file's BH Info tab, and inserts that value in the text area when the log is compiled.
To insert today's date in the header or footer, use this macro:
#d Inserts today's date in the text area when the log is compiled.
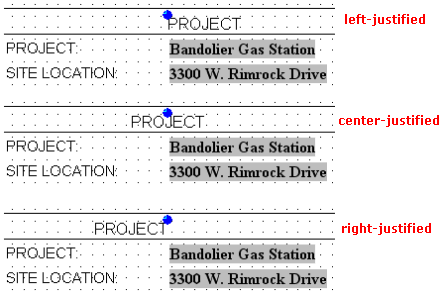
Horizontal Alignment: Click in a radio button to choose how the text is to be aligned horizontally relative to the insertion handle. In the graphic example below, the "PROJECT" label is set to Top vertical alignment, and shows the difference between left-, center-, and right-aligned text.
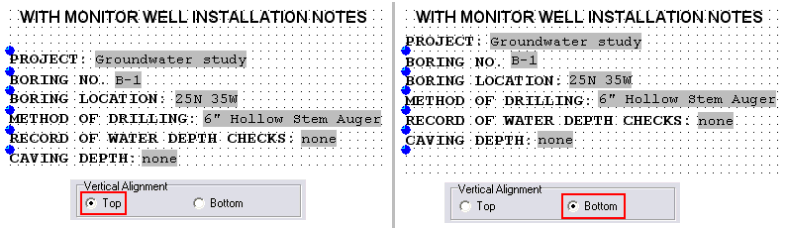
Vertical Alignment: Click in a radio button to choose how the text is to be aligned vertically relative to the insertion handle. In the examples below, the six Static Text labels are set to Left horizontal alignment, and show the difference between Top and Bottom vertical alignment.
Transparency: Click in a radio button to set the text as Transparent (with no background) or Opaque. If you select Opaque, click on the color box to choose a color for the background of the text.
The text label you specified will be displayed on the screen at the declared location.
See: Move or Resize Header/Footer Items for information about dragging, resizing, and aligning items.
If you need to access the Setup window you can:
![]() Back to Header/Footer Item Summary
Back to Header/Footer Item Summary
![]()