What's Next
Once you've converted your files and they are safely stored in the output RockWorks20xx folder, here are some tips about using these files. Remember that you can access all of these files from within the RockWorks Project Manager, along the left edge of the program window.
Grid Models
Solid Models
Datasheet Files
RockPlot2D Files
RockPlot3D Files
- Grid models (.RwGrd): You can use these grid models just like you did .GRD files in RockWorks15: Double-click on the model name in the Project Manager to display it, select the file name in any menu as the Input grid model, etc.
- Solid models (.RwMod): You can use these solid model just like you did .MOD files in RockWorks15: Double-click in the Project manager to display it, select the file name in any menu as the Input model, etc.
- Datasheet files (.RwDat): RockWorks20xx requires that you define coordinate systems and units for spatial data. When you open an .RwDat file into the RockWorks datasheet, note that there is now a second header row - that's reserved for units. You will need to define these in order to create maps, models, and other diagrams.
- General Information:
- Right-click above any column and choose Column Properties to access the datasheet setup pane. This is where columns can be defined as text, as containing graphic symbols or colors, or as containing spatial values.
- You can advance/backtrack to the next/previous column(s) using the green arrows to the right and left of the Data Column title at the top of the window.
- X and Y Coordinate columns:
- For any column containing an X or Y coordinate, choose the coordinate system and units.
-
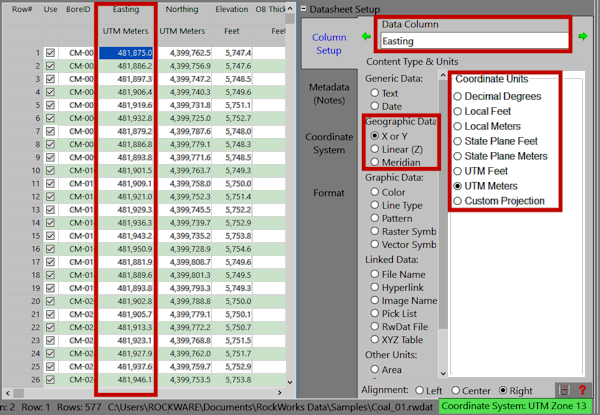
- If you don't know what they represent, just set them to the same system as you defined when you updated the RockWorks15 project database.
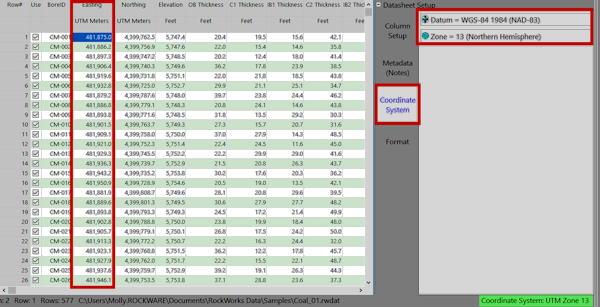
- If your coordinate system requires this, be sure to define the appropriate datum and zone in the Coordinate System tab of the Datasheet Setup pane.
-
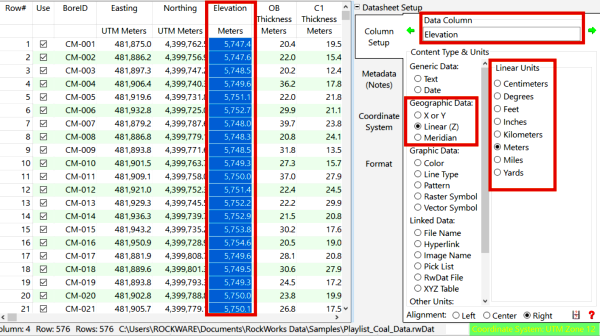
- Elevations: For any column containing Elevation measurements or thicknesses, you may define the units or leave them undefined.
-
- RockPlot2D files (.Rw2D):
- You can use these 2D graphic files just like you did .RK6 files in RockWorks15: Double-click on the file name in the Project Manager to display it.
- If the 2D image represents a map or a cross section/profile, and if you would like to geo-reference it (e.g. for export to Google Earth):
- In RockPlot2D, select the Utilities | Diagram + Projection Info menu.
- Define the diagram type (Map, Section or Profile, or general Diagram).
- For Map and Section/Profile diagrams you can then specify the XY Coordinate system and units that are represented. For those systems that require it, you can then choose the Datum and/or Zone.
- RockPlot3D files (.Rw3D):
- In most circumstances, you can use these 3D graphic files just like you did .R3DXML files in RockWorks15: Double-click on the file name in the Project Manager to display it.
- If the 3D scene contains a link to an external file, you will need to re-establish that link when you open it. For .MOD files, you can browse for the RwMod file equivalent.
- If you would like to geo-reference the scene (e.g. for export to Google Earth):
- In RockPlot3D, select the View | Dimensions menu.
- Click on the Units tab.
- Select the coordinate system and units which are represented here. Define the Datum and Zone if requested.
- Define the elevation units (feet or meters).
 Back to Converting Files | Back to Intro

RockWare home page