RockWorks | Graphics | Animate | RockPlot3D File -> Animation
Use this program to read an existing RockPlot3D scene (.Rw3D file) and create a video where the viewpoint, angle, and zoom can be adjusted either through the menu or with more detailed listings in the datasheet. The animation may be saved to a variety of video formats.
Feature Level: RockWorks Basic and higher
Menu Options
Step-by-Step Summary
- Input Options
- RockPlot3D File: Browse for the name of the existing RockPlot3D file (.Rw3D file) which contains the scene you want to animate and output to video.
- Animation settings
- Simple: Choose this option if the animation should use the beginning and ending viewpoints listed in the Output Options tab. With this method, the animation will start at the direction, angle, and zoom defined there for the Initial viewpoint, then move to the direction, angle, and zoom defined for the Final viewpoint.
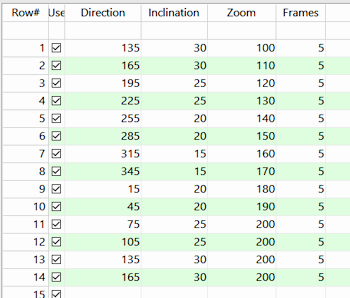
- Advanced: Choose this option if the animation should use the direction, angle, zoom, and frame count listed in the current RockWorks datasheet. With this method, the animation will start in the position defined in the first row, then move to the positions defined in the following rows, creating the indicated number of frames in each location.
- Output Options: Click on this tab to define the animation output file type and display settings. (More info)
! If you have chosen the Simple animation type, be sure to set the Initial and Final viewpoint settings.
- Access the RockWorks Datasheet program tab.
- If the animation script will be read from the datasheet, create a new datasheet and enter or import the direction, angle, zoom, and frame data into the datasheet.
Or, open one of the sample files and replace that data with your own.
! Click the Example button at the top of the window to load a sample file that is installed with the program.
You do not need to have anything in the datasheet if you will be defining only an initial and final viewpoint in the program dialog.
- Select the Graphics | Animate | RockPlot3D File -> Animation menu option.
- Enter the requested program settings, described above.
- Click the Continue button to proceed.
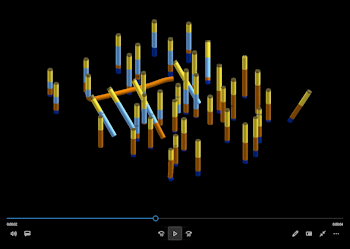
RockWorks will load the existing RockPlot3D scene. It will set the initial viewpoint from either the program settings or the datasheet, then proceed to the final viewpoint (via the datasheet intermediate steps if requested). The requested number of frames will be captured and output to PNG images based on the requested settings, storing them with the specified file name prefix in the Animation_Frames subfolder in your project. The images will be output to the requested animation type. The animation will be displayed in the default viewer as selected.
 Back to Animate Menu Summary

RockWare home page