![]()
How it's Used
How to Insert a Fill Bar Column into a Log Design
Menu Settings
How to Review the Settings
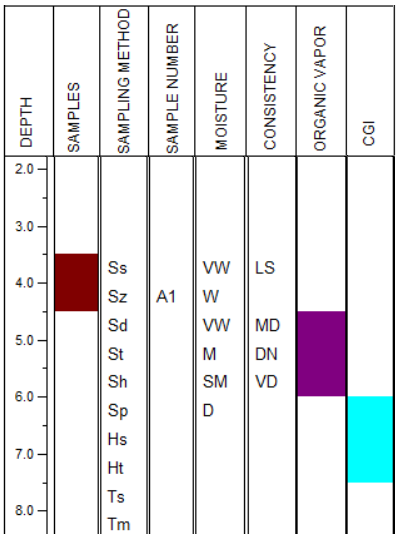
How it's used: A Fill Bar column is used to fill user-declared depth intervals with a specific pattern. Such pattern intervals are typically used to note sample intervals or intervals of qualitative nature such as "trace show" or "good porosity."
How it works: As you compile your log in LogPlot, the program will locate depth intervals listed in a Fill Bar datasheet. It will plot either (1) a constant (user-specified) pattern from the top to the base of the interval in the Fill Bar column of the same name, or (2) if the data lists a keyword for the interval, it will plot the keyword-specified pattern fill for the interval. Each Fill Bar column on the log must have a separate Fill Bar datasheet or column within a Fill Bar datasheet in the data file.
Alternatives: If you need pattern columns that are linked to lithology data, use a Lithology Pattern Column.
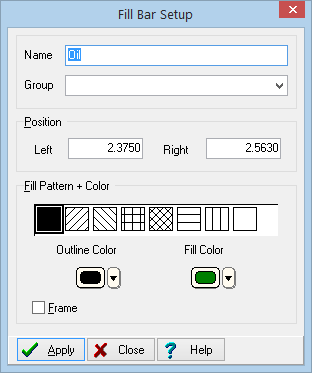
Name: Enter the name for this Fill Bar Column. Any fill bar data in the LogPlot data file that is flagged with the same name will be plotted in this column.
Position: These coordinates determine the horizontal placement of the Fill Bar column in the body of the log. The horizontal coordinates are expressed in decimal inches or centimeters relative to the left edge of the design screen. You may change the column's position by editing these values, or by widening/narrowing the column itself on the work screen (see Moving and Resizing Log Body Components).
Fill Pattern + Color: Use these settings to define the default fill for the column. This will be used if you do not define a keyword for the interval in the datasheet.
Pattern: Click on the pattern to be used to fill the Fill Bar intervals.
Outline Color: Choose the color for the outline of the filled intervals.
Fill Color: Choose the color for the pattern to be used to fill the intervals.
Frame: Insert a check here if you want the entire Fill Bar column to be drawn in a solid black line. Remove the check if no outline is desired. If deactivated, the column will be "invisible" unless an interval is plotted.
If you need to access the Options window you can:
![]() Back to Log Body Item Summary
Back to Log Body Item Summary
![]()