RockWare | Borehole Manager | StripLogs | 2-Dimensional | Single Log
Use this tool to create a 2-dimensional (flat) strip log of a single well, displaying observed data entered into the Borehole Manager data tables. The log can include any combination of the available log items. The boring can be vertical, inclined, or deviated - you can specify the view angle to define how any non-vertical holes will be projected; you can also 'unwind' deviated logs that project onto themselves. The completed log will be displayed in the RockPlot2D window.
Menu Options
Step-by-Step Summary
Menu Options
- Current Borehole Name: This will default to the currently-selected borehole in the Borehole Manager window; choose a different borehole name as you wish.
- Clip (Truncate Logs): Insert a check in this box if you want to display a subset of the log data. Expand this heading to define the elevation range to be displayed. (More.)
! Log clipping parameters are defined using elevations, not depths.
- Unwind: Check this option to plot a profile of a deviated borehole in which the azimuth is constant and normal to the viewer, as if the deviated well were unwound to the East. Note that this is not a "projected" profile (ala' the non-unwound striplogs or the projected profiles). (More.)
- View Direction: If the well to be represented in the log is not vertical, you can use this setting to specify the direction toward which the log is to be viewed. For example, to view the log from the south, toward the north, you would enter 0.0; to view the log toward the east (from the west), you would enter 90. This will be ignored for Unwound logs, above.
- Intended Vertical Exaggeration: Click here to pre-define the vertical stretch you would like to apply to your log. By giving the program this information in advance of generating the log, it can help with text and graphic sizing and placement.
! Note that you can always change the vertical exaggeration at which the log is displayed, in the RockPlot2D window itself. But, by telling the program up-front how stretched the log will be, you'll get better placement of the graphic components.
- 2D Striplog Designer: Click on the 2D Striplog Designer tab to the right, to select:
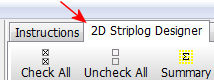
- Visible Items: Use the check-boxes in the Visible Items column to select which log items are to be displayed. See Visible Item Summary for information about the different log items.
- Options: Click on any of the Visible Items names to see the item's settings in the Options pane to the right. See the Visible Item Summary for links to the Options settings.
- Layout Preview: For each item you've activated, you'll see a preview cartoon in the upper pane. Click and drag any item to the left or right to rearrange the log columns. See Using the 2D Log Designer.
- Rules & Filters: Use the settings on the far right side of the window to apply stratigraphic rules, date filters, and/or spatial filters to data being displayed in your log. (More.)
Step-by-Step Summary
Follow these steps to create a vertical, 2-dimensional (flat) strip log of a single borehole. The borehole can be vertical (no downhole survey information in the Orientation table) or inclined or deviated (with downhole survey information).
- Access the Borehole Manager program tab.
- Enter/import your data into the Borehole Manager database.
- In the list along the left side of the Borehole Manager window, click on the name of the borehole whose data is to be displayed in the log, so that it is shown as the active borehole.
- Be sure the check-box to the left of the borehole name is checked so that the borehole is enabled.
- Select the Borehole Manager | StripLogs | 2-Dimensional | Single Log menu option.
- Establish the settings, as described above.
- Click on the 2D Striplog Designer to establish the layout of the log diagram.
- Click on the Process button to create the striplog diagram.
The program will create a 2D, projected view of the data contained in the selected borehole, reading its data from the borehole database. Only the log items you have activated will be displayed in the log. The log will be displayed in a RockPlot2D tab in the Options window.
- You can adjust any of the log settings in the options to the left, on the 2D Striplog Designer tab, or in the Rules & Filters tab, and click the Process button to regenerate the log.
! Each time you click the Process button, or press the <Enter> key on your keyboard, the existing display will be replaced.
! Tip: You can undock the plot window using the  button.
! Tip: Save the log (File | Save) in RockPlot2D. Then choose a different borehole name in the options to the left and click Process to create the striplog for another hole.
! Tip: Choose the Edit | Copy to New Window option in RockPlot2D to "undock" the striplog diagram. Then choose a different borehole name and create another log.
- View / save / manipulate / print / export the log in the RockPlot2D window. (More.)
 Back to StripLogs Menu Summary

RockWare home page