Now click on the Block Selection tab; this is where you will associate (or "map") the Excel worksheets (on the left) to the RockWorks database tables (on the right).
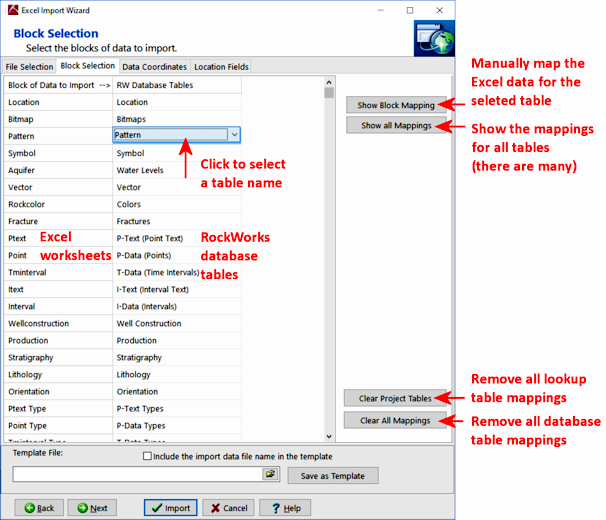
- Block of Data to Import: Listed in this column are all of the worksheets read from the Excel file.
! If the Excel spreadsheet has a lot of worksheets, you'll need to use the scroll bar to view them all.
- RW Database Tables: Listed in this column are the names of the tables in the Borehole Manager database.
- If the import worksheets to the left are named according to the format defined in the File Format section, the importer will recognize them and list the appropriate data table automatically.
- If a worksheet is not recognized, no database table will be mapped.
- To remove an RW Database Table name ("unmap" it), click on it; you'll see a long pop-up menu. Scroll to the top of the list and select the blank field.
Example: if you are appending the Excel data to existing borehole records and you don't want to replace the existing Lithology information, you would click on the Lithology item in the second column, and click on the blank field to remove the mapping. In this way, RockWorks will know to ignore the data in the Lithology worksheet in the Excel file during import.

- To add an RW Database Table name (to map it), click on the blank cell in the second column, and choose the table name from the pop-up list.
Example: if the Excel file's worksheet containing the project dimensions is named "Projdimensions" rather than the expected "Dimensions," it would not auto-map. You could click on the blank database name to map "Projdimensions" worksheet to the "Dimensions" table.
! Important Note: If you are importing data for existing boreholes in your project, and have set the overwrite option to Update Existing Record, any worksheets that you select to import will replace all existing data of that type for each well. For example, if you request import of lithology data from a "Lithology" worksheet, ALL existing lithology data for those wells will be replaced by this new data. Please refer to the "What do you want to do" scenarios for specific examples.
- Show Block Mapping button: Use this button to view and map the data in the currently selected worksheet. This is very handy if you have extra columns in your Excel file or if the column headings are not what RockWorks expects. ! If you have I/P/T-Data that should be appended rather than replace the existing data in the database, you should also click this button so that the “Replace data” option can be unchecked at the top of the I/P/T-Data Fields tabs.
In this example, the Orientation worksheet in Excel had the direction data labeled "bearing". RockWorks did not automatically map that.
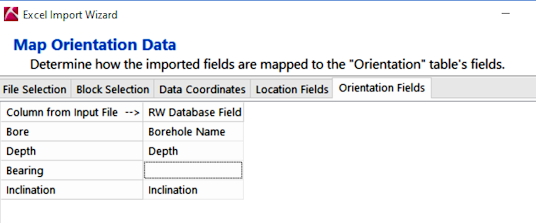
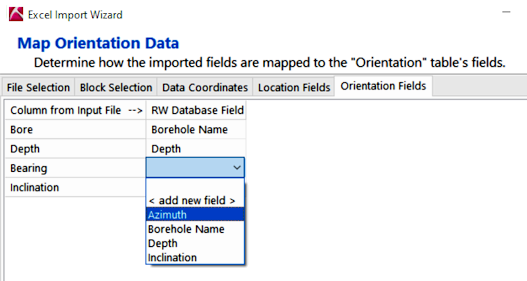
Just select the database field to associate with this data.
- Show all Mappings button: Click this button if you want to see the Excel -> RockWorks mappings for all data types. They will be displayed in tabs at the top of the importer window. If you have a lot of data types, there will be a lot of tabs.
- Clear Project Tables button: Use this button to quickly unmap all of the accessory tables in the database, such as the Types tables, the color-contour table, and the like. This will leave the data tables only (Location, Bitmaps, Pattern, etc.).
- Clear All Mappings button: Use this button to quickly unmap all of the tables.
Example: if you had already imported your Excel spreadsheet, but need to re-import for an I-Data update only, you might clear all mappings, and then manually map only the I-Data (Intervals ) and I-Data Types tables.
- To continue, click the Next button at the bottom of the import window, or simply click on the Data Coordinates tab.

RockWare home page
 Prev ( get ready ) | Next ( describe the coordinates )