In this section, you will open a RockWorks point map, resize its window, zoom in and out of the map image, and combine it with another map.
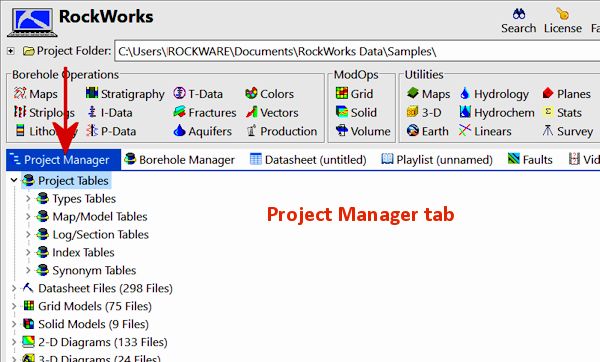
- Locate the Project Manager tab in the main RockWorks program window. Here you'll see a variety of different files that are contained in the current project folder.
! You can dock the Project Manager alongside the Borehole Manager if you prefer.

- Expand the
 2-D Diagrams heading to see the list of RockPlot2D maps and diagrams.
- Double-click on the Tutorial_PointMap.Rw2D file.
RockPlot2D will display the point map, created by RockWorks, on the screen. RockPlot2D saves and opens graphics files in its own binary plot file format, with the file name extension ".Rw2D." If you wish to store your 2D graphics files in a DXF, WMF, BMP, JPG, EMF, TIFF, PNG, or RockPlot3D XML file format, you can do so with the Export command in the RockPlot2D File menu.
! Note that you can also open a blank RockPlot2D window by clicking the Plot2D button  at the top of the main RockWorks program window. From there you can use File | Open to open a saved map or diagram.
- Resize the window and rescale the plot: "Grab" the lower-right corner of the RockPlot window that contains the point map by positioning your mouse pointer on it (the cursor will change to a diagonal arrow) and depressing the mouse button. "Drag" the corner to enlarge or reduce the size of the plot window as you wish.
- Click the Zoom Out toolbar button to refresh the display within the new graphic space.
 The map will rescale within the resized window.
There are two other toolbar buttons or View menu commands which affect the plotting of an image within the screen window:
 Stretch fills the window with the image, while...
 Best Fit fills as much of the window as possible while maintaining the current vertical exaggeration ("VE") factor.
- Zoom into the map:
- Click on the Zoom In toolbar button
 .
.
- Position the tool in the map area shown below, depress the mouse button, and drag the rectangular "rubber band" around a portion of the map, shown below.

- Release the mouse button, and the program will redraw the portion of the map you selected within the RockPlot window.
- You may repeat this process again, if you wish, to further enlarge the display.
- When you are ready to zoom back out, you can click:
 This zooms back to the previous zoom state (one zoom back)
 This button zooms back to the full extent of the map.
- In order to create screen and printed overlays, RockPlot permits you to combine saved plot files, appending the contents of one onto the end of the other.
- Be sure the point map is still displayed on the screen, and is the "active" window.
- Click on the RockPlot2D File menu and choose Append.
- From the displayed dialog box, select the contour map that will be appended to the map of control points. Choose the file: Tutorial_ContourMap.Rw2D and click Open.
The program will open a new RockPlot window, it will plot the original point map in the window, and then plot the contents of the contour map on top. The combined map is now displayed the new, untitled window. (Note that by creating a new RockPlot window for the combined image, the program does not alter the original image.)
! RockWorks maintains real-world coordinates as it builds your maps. So, if your source data is listed in global UTM coordinates, for example, the map will also be stored as such. Keep this in mind when using the Append command: The maps must overlay in real life for them to overlay correctly in RockPlot. (In other words, you can't combine a lon/lat map with a UTM map.)
! You can append existing maps to new maps that you create, using the Other 2D Files program tab.
- Bring the point layer to the front of the map:
- Locate the Layers pane to the right of the map.
- Find the layer labeled Points and right-click on it.
- Choose Bring to Front from the menu.
The points will now display on top of the contour bands.

- Save the combined map:
- Click on the Save button
 or choose File | Save.
- Enter the name: points and contours and click Save. The combined image will be saved under this name, with an ".Rw2D" file name extension.