RockPlot2D | Digitize | Points
Use the Points menu item or toolbar button to digitize points on the RockPlot2D screen display in order to record their X,Y coordinates to the window's Data pane.
- If necessary, open the diagram for which you wish to digitize points (see Opening Plot Files) or click in the current RockPlot2D window containing the diagram.
- Choose the File | Options command if you wish to view/change the size and color of the points to be drawn on the screen. You should also check the number of decimal places specified for the coordinates so that you will get the accuracy you need. See Measurement and Digitizing Options. The style of the symbols is hard-wired to be small Xs.
- Select the Digitize | Point menu item, or click on the Digitize | Point button at the top of the screen
 .
.
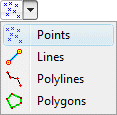
The Point button is available in the Digitize drop-down menu.
The program will be in "Digitize Point" mode, as noted at the bottom of the screen.
- Position the pointer at the location in the graphic window where you want to record the coordinates, and click the left mouse button to record the point.
- The program will display a symbol on the image to mark the point. It will also record the point's X,Y coordinates in the data window to the right. (Don't see the data window? Click here.)
- Continue digitizing points on the screen display as you wish.
- To terminate the Digitize Points mode, click the Digitize Point x button at the bottom of the window, or click the Edit button
 at the top of the window, or press the Shift+Escape keys.
! If you recreate or close the RockPlot2D window before copying the data to the clipboard, it will be lost. The data is not stored in the Rw2D file.
- Use the Options | Export tools to copy the data to the clipboard or export the data to the datasheet or a text file.
- Use the Options | Convert to Diagram tools to create a new image containing the digitized items or to append the items in the data window to the underlying graphic.

RockWare home page