Subsites are designed to permit users to viewi and model small areas within a larger project. By creating subsites, it is possible to still have all of the boreholes within a single database rather than creating separate RockWorks project databases.
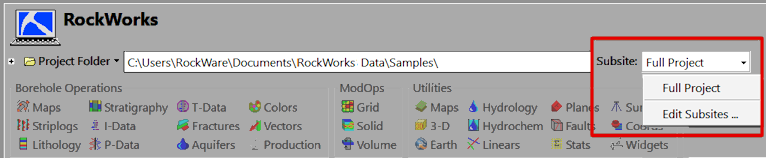
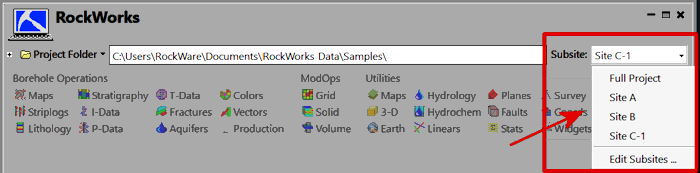
- Click on the Subsite button to the right of the Project Folder name. When initially clicked,a pull-down menu will appear showing two options.
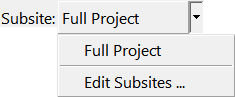
- The Full Project option will reset the Project Dimensions to the original, large-scale dimensions.
- The Edit Subsites option is used to create and/or edit one or more subsites. These subsites may be widely separated, adjacent to each other, or overlapping.
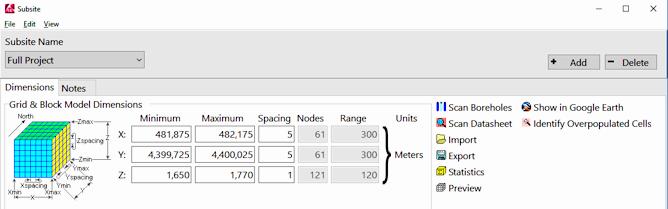
- Click the Edit Subsites option. You will see the following window:
- To create a new subsite, click on the Add button. A window will be displayed.
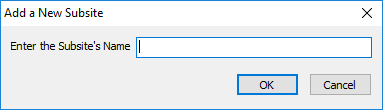
- Enter the Subsite's Name: Type in a name for the Subsite.
- Click OK. You'll see the subsite name at the top, and the subsite dimensions below.

- Establish the Subsite dimensions. There are several ways to do this:
- Type in the minimum and maximum X, Y, and Z coordinates.
- Click the Import button to the right (or click File | Import Dimensions) to import a list of dimenisons previously saved (via the Export button).
- Click the Scan Datasheet button (or click Edit | Scan Datasheet) to scan the current datasheet for the subsite extents. (More info)
- Click the Scan Borehole button (or click Edit | Scan Boreholes) to scan the current database for the subsite extents. (More info)
- Use the Image tab within the Subsite menu to select or create a background image relating specifically to the subsite dimensions. Use the Set Image button to preview the cropped image.
Note: you must have a project image active to view a cropped subsite image.

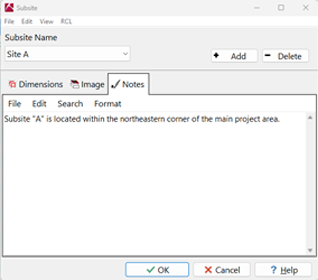
- Use the Notes tab within the Subsite menu to add miscellaneous notes, including images, relating to the subsite (see example below). (More info)
- Click the OK button to accept the Subsite dimensions and notes.
You will be prompted if the boreholes outside the new subsite should be disabled.
- Disable all of the boreholes outside of the subsite "name" dimensions?
- Buffer Percent: This represents a percent of the diagonal extent of the Subsite. Holes within this small margin outside the Subsite extents will remain enabled. This can prevent edge effects when plotting maps of adjacent subsites.
- Enable all boreholes inside the subsite:
- Check this box if you want the program to enable all of the holes inside the subsite.
- Uncheck this box if you have intentionally disabled holes within the subsite and don't want the program to re-enable them.
- Click Yes to turn off all of the holes outside the subsite + buffer.
- Click No to leave borehole enabled/disabled status as-is.
- Once the subsites have been defined, switching between them, or switching back to the full project dimensions, is simply a matter clicking on the Subsite pulldown and picking the desired site.
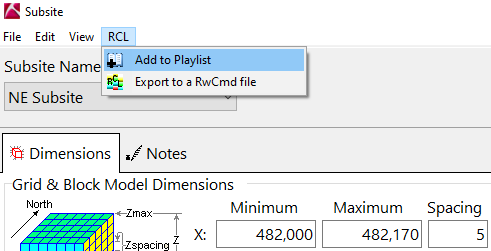
You can add the dimensions of the subsite to a RockWorks Playlist or Command script by following these steps:
- Select Edit Subsites at the top-right of the main RockWorks program window.
- Select the specific subsite to load.
- Click on the RCL menu at the top of the window. Choose Add to Playlist to add this to your playlist. Choose Export to a RwCmd file to output the subsite information to a command script.
-
 Back to RockWorks Projects - Overview

RockWare home page