RockWorks | Graphics | Animate | Google Earth Flyovers | Clipboard -> Forward Flyover
This program:
- Reads a Google Earth path that you've copied into memory.
- Creates a KML output file containing a forward-looking flyover along that path, using the menu-defined settings.
- Creates a KMZ (zip) output file, containing the KML file with the tour.
- Loads the KMZ file in Google Earth.
This is a really handy way to create a quick tour from an existing path in Google Earth that you simply copy to the clipboard.
See also
Circular Clipboard Flyover
Feature Level: RockWorks Basic and higher
Menu Options
Step-by-Step Summary
- Options
- Tour Title: Defines the flyover tour name.
- Time (Seconds) Between Points: Enter here the number of seconds to transpire between each pathway point.
- Altitude (Meters - Relative to Ground): Enter here how high, in meters, above the ground you want your flyover to occur.
- Tilt: Enter the viewing tilt, from 0 (horizontal) to -90 (straight down).
- Path Smoothing Factor: Enter here an integer value for smoothing the route. A flyover with smoothing of "3" will create much less camera-bounce around sharp corners than a flyover with smoothing of "0". Beware that high smoothing can cut tight corners.
- Group Name: Click on this tab to type in the name for the flyover, as displayed in Google Earth.
- Output Options: Click on this tab to define the output file and display settings.
- Output File Name
- Automatic: Choose this option to have RockWorks assign the name automatically. It will use the name of the current program plus a numeric suffix, plus the ".KMZ" file name extension.
- Manual: Click this option to type in your own file name. The extension is ".KMZ".
- Display output within Google Earth: Check this box if you want to display the output at this time in Google Earth.
! Note that the actual program which will be used to display the KMZ file is determined by your Windows settings.
- Use Custom View: If unchecked, the starting viewpoint for the map will be determined automatically. If checked you can set a custom view.
-
- Longitude, Latitude: Type in the longitude and latitude coordinates where the viewpoint will be.
- Heading: Type in the 0 to 360 degree bearing from the viewpoint to the start of the flyover.
- Tilt: Type in the angle downward from the viewpoint to the flyover.
- Range: Enter the distance in meters from the viewpoint to the flyover.
- In Google Earth, insert a new path or locate an existing path.
- Right-click on that path and choose Copy from the pop-up menu.
- In RockWorks, select the RockWorks | Graphics | Animate | Google Earth Flyovers | Clipboard -> Forward Flyover menu option.
- Enter the menu options as described above.
- Click the Continue button to proceed.
The program will create a KML file listing the flyover path along the copied path using the defined menu settings. It will create a KMZ (zip) file containing the KML file. The Google Earth KML and KMZ file names will be assigned as you specified.
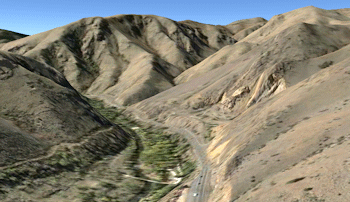
The resulting flyover will be displayed in Google Earth, if requested.
 Back to Animate Menu Summary
"Google" is a trademark of Google Inc.

RockWare home page