Import Text Data - Map the Data Blocks

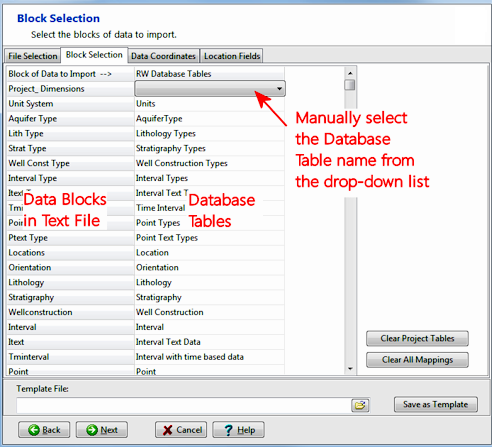
On the Block Selection tab, you'll see the following:

  1. Get oriented: Note the following:
  2. If you want to remove an association between the text file block and the database (you don't want to import that data to that table), click on the Database Table name. A pop-up window will appear. Choose the blank line, at the top of the listing, and that will blank out that cell. For example, if you are appending the new data to existing borehole records and you don't need to update the existing Lithology information, you would click on the Lithology item in the right-hand column, click on the blank row, and you'll be returned to the window with no mapping for the Lithology block.


  3. To add or change an association between a text file block and a database table, click on the existing database table name, and choose another from the pop-up list. For example, if the file's Dimensions block had been named "Project_Dimensions" rather than the expected "Dimensions," as in the example above, you could click choose the Dimensions table name.

    ! Important Note: If you are importing data for existing boreholes in your project, and have set the overwrite option to Update Existing Record, any import blocks that you select to import will replace all existing data of that type for each well. For example, if you request import of lithology data from a "Lithology" block, ALL existing lithology data for those wells will be replaced by this new data. Please refer to the "What do you want to do" scenarios for specific examples.

  4. To do a quick, bulk clear of the project's Types tables (Lithology types, Stratigraphy, Types, etc.), click the Clear Project Tables button.
  5. To clear all database names, click the Clear All Mappings button. For example, if you had already imported your ASCII data, but need to re-import for an I-Data update only, you might clear all blocks and then map only the Interval and Interval Type items.
  6. Click on the Next button at the bottom of the window to continue, or simply click on the Data Coordinates tab at the top of the window.

  Prev ( select file )     |     Next ( establish import coordinates

RockWare home page