RockWorks | Utilities | Imagery | Convert (Image -> New Map) | Single
RockWorks | Utilities | Imagery | Convert (Image -> New Map) | Multiple
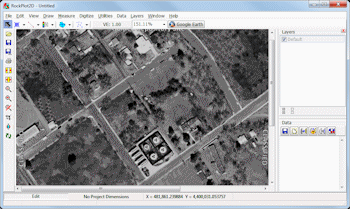
These programs are used to import raster images into a RockPlot2D window.
- The Single option imports one raster image into RockPlot2D; it is the same tool as RockPlot2D's Import Raster tool.
- The Multiple option will import multiple raster images into the RockPlot2D window; the file names and coordinates are read from the datasheet.
See also: Appending Raster Images to an Existing RockPlot2D Image
Menu Options
Step-by-Step Summary
Menu Options
In the middle pane of the program window, you must choose whether you will be importing a single image or multiple images.
- Single File: Click in this button to create a RockPlot2D file (Rw2D) with a single raster image. Expand this heading to establish particulars:
- Input File: Click here to browse for the Image to be displayed in RockPlot2D.
- Image Location: You have several options for entering the coordinates at which the bitmap is to be displayed in RockPlot2D:
- Project Dimensions: Choose this option if the current project dimensions represent the border coordinates for the image you've selected.
- World File: Choose this option if there is an accompanying World File which defines the image extents. Expand this heading to select the World File.
- Automatically Determine: Choose this option if the program is to search automatically for a World File with the same file name as the Image File, above, and with either world file name extensions: *.bmpw or *.bpw (italicized letters are replaced by the extension characters of the Image File, as in *.pngw or *.pgw, etc.)
- Manually Select: Choose this option to specify the name for the World file. Expand this heading to browse for the World file to be used for georeferencing the selected image.
- Manually Specify: Click in this radio button if you want to type in the X and Y coordinates for each bitmap corner. Expand this heading to enter those coordinates.
- Western Border: Enter the X (Easting) coordinate represented along the western edge of the image (X-Min).
- Southern Border: Enter the Y (Northing) coordinate represented along the southern edge of the image (Y-Min).
- Eastern Border: Enter the X (Easting) coordinate represented along the eastern edge of the image (X-Max).
- Northern Border: Enter the Y (Northing) coordinate represented along the northern edge of the image (Y-Max).
- Multiple Files: Create a RockPlot2D file (Rw2D) with multiple raster images. In this case, the file names and coordinates are listed in the Utilities datasheet. Be sure the Input Columns in the left pane are correctly defined:
- Input File: Select the datasheet column that lists the names of the images to be displayed.
Tip: use the File | Import | Create File List program to quickly create a list of specified file names.
- Min X: Choose the datasheet column listing the world/diagram Easting coordinates for the west/left edge of the image.
- Min Y: Choose the datasheet column listing the world/diagram Northing coordinates for the south/bottom edge of the image.
- Max X: Choose the datasheet column listing the world/diagram Easting coordinates for the east/right edge of the image.
- Max Y: Choose the datasheet column that lists the world/diagram Northing coordinates for the north/top edge of the image.
Step-by-Step Summary
- Access the RockWorks Utilities program tab.
- If you are bringing in MULTIPLE images, create a new datasheet and enter/import your list of image names and coordinates into the datasheet.
Or, open one of the sample files and replace that data with your own. (In the Samples folder, an example file = "\RockWorks17 Data\ Samples\Raster_Multiple_01.rwDat".)
If you are bringing in a SINGLE image, you don't need to list anything in the Utilities datasheet.
- Select the Imagery | Convert (Image -> New Map) | Single option to import one image.
Select the Imagery | Convert (Image -> New Map) | Multiple option to import multiple images.
- Enter the requested menu settings, described above.
- Click the Process button to proceed.
RockWorks will read the indicated raster file name(s) and reference coordinates, and display the image(s) in a RockPlot2D tab in the Options window.
- You can adjust any of the diagram options in the pane to the left and then click the Process button again to regenerate the image.
! Each time you click the Process button, the existing map display will be replaced.
- View / save / manipulate / export / print the map in the RockPlot2D window.
 Back to Imagery Menu Summary

RockWare home page