RockWorks | Utilities | File | Import | Create File List
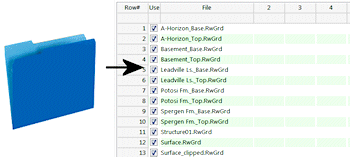
This program is used to import into the Utilities datasheet a list of file names from the current project folder, using a user-selected file type or wildcard search. For example, let's say you have created a series of T-Data solid models for different dates (using the Borehole Manager's T-Data | Model program) and you want to create a morphed animation of these models (using the Utilities Solid | Morph program). Simply use the Create File List option to populate the datasheet with the names "Arsenic*.rwmod" and you'll quickly have your list of all of your Arsenic solid model file names to morph. Note that the names will be listed in alphabetic order.
This program is a useful tool when creating lists of files for the following RockWorks Utilities programs:
Map | Polyline Maps | Multiple Polylines (Simple)
Map | Polyline Maps | Multiple Polylines (Advanced)
Map | Polyline Maps | Shotpoints
Map | Polygon Maps | Multiple Polygons (Simple)
Map | Polygon Maps | Multiple Polygons (Advanced)
Map | SpherePlot | All programs that use polylines.
Grid | Grids -> Stratigraphic Fence
Grid | Grids -> Stratigraphic Model
Grid | Grids -> 3D Stack
Grid | Grids -> Stratigraphic Logs
Grid | Grids -> Solid Model
Solid | Morph
Imagery | Convert | Multiple
Imagery | Horizontal | Multiple
Imagery | Vertical
Imagery | Vertical Images -> Color Model
Imagery | Vertical Images -> X|Y|Z|Color
Imagery | PicShow
Grafix | 2D Utilities | Montage
EarthApps | Lines | Polylines | Multiple
EarthApps | Lines | Pipelines | Multiple
EarthApps | Polygons | Polygons | Multiple
EarthApps | Images | All Drape, Float, and Vertical programs.
(and probably more!)
Menu Options
Step-by-Step Summary
![]() Back to Importing Data
Back to Importing Data
![]()