 Estimated time: 3 minutes.
In this section, you will open a 3D strip log image, adjust the background color, change the view, adjust the vertical exaggeration, and turn various items on and off.
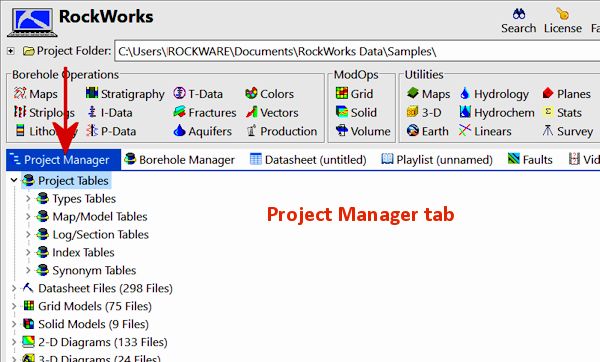
- Locate the Project Manager pane or program tab. Here you'll see a variety of different files that are contained in the current project folder.

- Expand the
 3D Diagrams heading to see the list of RockPlot3D scenes.
- Double-click on the Tutorial_Logs.Rw3D file.
RockWorks will display the stratigraphy logs in the RockPlot3D window. Images are always displayed in the "image" pane, and the individual reference and data items are listed in the "data" pane. Linked files (which we’ll address in later lessons) will be displayed in the pane below the data listing.
! Note that you can also open a blank RockPlot3D window by clicking the Plot3D button  at the top of the main RockWorks program window. Once the blank plot window is displayed you can use the File | Open menu option to open a saved scene.
- Change the background color of the image pane: Click in the color box
 in the upper toolbar, and click on the white color sample.
- Adjust the reference items: In the upper portion of the data pane, be sure these items are on/off:
 Orientation: on
- Axes: on
- Labels: on
 World Outline should not be checked.
- Set the view to a pre-set location: Click on the RockPlot3D View menu and select Above | South-East.
The program will orient the display so that the logs are being viewed from above, from the southeast.
- Rotate the image: The Rotate button
 should appear pressed in (it’s the default viewing tool). Position the mouse pointer in the middle of the image display, click and hold the mouse button, and drag slightly to the right. You should see the image rotate to the right. Release the mouse button to let go of the image. (If you want to take a moment to play with the rotation tool, feel free. You can always use View | Above | South-East to reset the view.)
- Adjust the Zoom: Click on the Zoom In toolbar button, and click anywhere in the scene to zoom into the view. You can also use the Zoom Percent drop-down at the top of the window, to enlarge the scene.

- Save a Viewpoint: Once you have a viewing point and zoom state that you like, let's save this for later retrieval. Click on the View menu and choose Add View. Type in a name for this viewpoint, such as "Northwest Zoomed In" or "Overhead", and click OK. You'll see this displayed under the saved Views in the data tree.

To re-display the current 3D scene at that viewpoint, just double-click on it.
- Adjust the vertical exaggeration:
- Click on the Dimensions button
 . This window displays the real-world coordinates of the 3D image. It also controls the vertical stretch.
- Vertical Exaggeration: In this prompt, type in 1.5.
- Click Apply to make the changes take effect.
You should see the logs in the image pane appear stretched. There will be a note along the bottom of the RockPlot3D scene now, that "Vert Exag = 1.50".
- In the data listing, you’ll see "groups" noted with the
 icon. This means that there are sub-items grouped together underneath the heading, visible if you expand the group’s "+" button.
- Expand the "Logs" group heading in the data pane, and you’ll see the individual borehole names displayed. Remove the check-mark from the boring named "DH-12" and notice it has disappeared from the image pane. Re-activate the log by re-inserting its check-mark.
- Expand the borehole group named "DH-4" and you’ll see the individual visible components to the log – the title and the stratigraphic layers. You can turn any of these items on and off by removing its check-mark. Expand the Stratigraphy group under this borehole and you will see the individual formation intervals. These, also, can be turned on and off.
- Turn all log items back on by inserting necessary check-marks.
- Collapse the listing in the data pane by clicking in the "-" button next to the "Logs" group icon.
 Viewing RockPlot3D Files
See also: Borehole Manager tutorial for many lessons on generating the 3D log images.

RockWare home page