The first import window is used to specify the name of the file to be imported:
The program will scan the LAS file, and will list the header information in the reference window in the import dialog box.
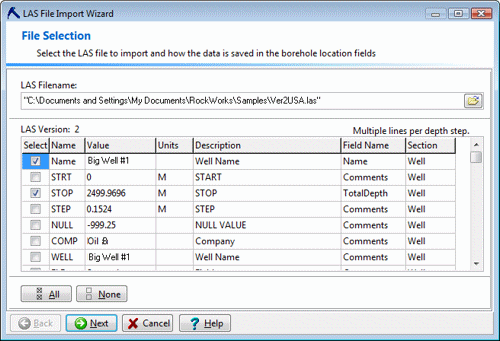
! The information in this section will vary from file to file. Only the STRT, STOP, STEP, and NULL fields are required in the LAS format. You may see only these fields, or a lot more.
! The first Name field is important. The Value you see will have been pulled from the LAS file's API number, or Unique Well Identifier, or other type of name field. As noted below, you'll have a chance to change the name record for this data.
- If you would like the item to be recorded to a field and if the field already exists, just choose the field to which the item should be mapped.
- If you would like the item to be recorded to a field but that field does not yet exist, choose the <new> option in the Field Name drop-down list.
-
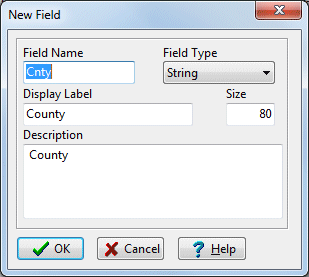
- The default name will be the value from the LAS file's Name column; edit this as necessary to make it more meaningful. Select the Field Type from the drop-down list. The fields you add to the project's Location table will be displayed in the Optional tab in the Borehole Manager, for all boreholes. See Setting Up Optional Fields for more information.
- Click OK when the New Field information is entered to your satisfaction.
- You should map the Name to the "Name" field. Later during the import process you can edit the well name if necessary.
- The STOP field can be used as the TotalDepth, if appropriate. You can edit this also, prior to completing the import.