RockWorks | Utilities | Imagery | Raster Conversion
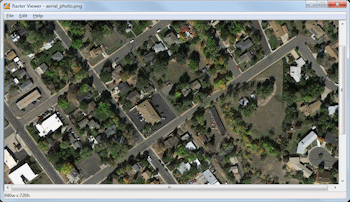
This program is used to open a raster image into a viewing window, and offer tools for resizing, sharpening, rotating, and resaving or saving to a different file format. This tool supports BMP, JPG, EMF and WMF, PCX, PNG, TGA, and TIFF formats.
See Rectifying Images for tools for calibrating, rotating, and clipping aerial photos; see Plotting Raster Images in RockPlot2D for tools for importing raster images into RockPlot.
Menu Options
Step-by-Step Summary
Menu Options
- File Menu
- Open: Displays a dialog box where you can select a raster image file, in one of the formats listed above, to open for display in the Raster Viewer window.
- Save: Saves the current raster image, under the same file name and file type.
- Save As: Saves the current raster image under a new name. You can choose a different file type as well.
- Save Options: Offers compression and color options for saving as JPG, TIFF, and BMP.
- JPG
- JPEG Quality/Compression: JPG files can be created with varied compression. Generally, the higher the compression, the smaller the file size, but image quality can be degraded. Lower compression will result in slightly larger files, but will assure the best image quality. Use the slider bar to select the compression/quality level.
- JPEG Format: Choose 8-bit Grayscale or 24-bit Color by clicking in the appropriate radio button.
- TIFF
- TIFF Image Format: Select the desired color depth by clicking in the appropriate radio button. As you increase the number of colors in the image the resulting file size will increase.
- TIFF Compression: Choose the desired compression scheme, if any, by clicking in its radio button.
- BMP
- BMP Image Format: Select the desired color depth by clicking in the appropriate radio button. The more colors stored per pixel, the larger the resulting file size.
- Exit: Closes the Raster Viewer window.
- Edit Menu
- Resize: Allows you to resample the image to a larger or smaller number of pixels.
- Size:
- Original: Displayed here will be the current size of the image, expressed in the number of pixels horizontally and vertically.
- New: Type in the new size for the image, in number of pixels horizontally and/or vertically.
- Maintain Aspect Ratio: Check this box for the image's horizontal:vertical pixel ratio to remain constant. If checked, when you enter a new horizontal or vertical pixel size, the other will be updated automatically. If not checked, you'll need to enter both New pixel sizes.
- Method: Choose the resizing method.
- EWe show on our Example page some samples of an aerial photo resized to half its original size (down-sampled) using the different methods. Though this sample image is a bit small, you may note that some methods produce more pixelated output and some more blurry. Mitchell is default.
- Sharpen: This tool allows you to sharpen the contrast in the image.
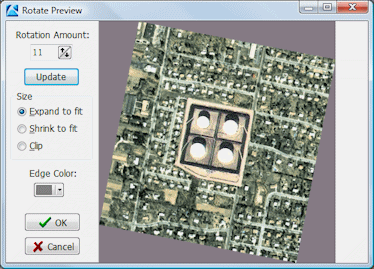
- Rotate: Select this option to free-rotate the image.
- Rotation Amount: Type in the amount, in degrees, by which the image is to be rotated. (You can also click the up- or down-arrow buttons to define the rotation amount.) Positive values will rotate clockwise, negative counter-clockwise.
- Size:
- Expand to Fit: Select this if the image is to be enlarged to accommodate the rotated version.
- Clip: Select this option if the pixel dimensions are to remain constant and the image will be clipped.
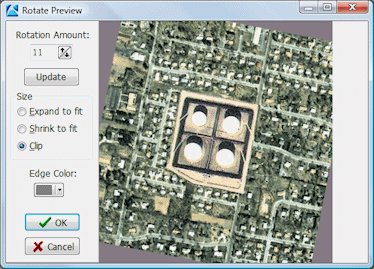
- Edge Color: Click on the color box to select a color for the background, as shown above in gray.
- Undo: Use this option to undo any recent changes.
Step-by-Step Summary
- Access the RockWorks Utilities program tab.
- Select the Imagery | Raster Conversion menu option.
- Use the File | Open option to open the raster image to be modified or viewed. This image can reside in the project folder or elsewhere on your computer.
- Use the menu items described above to resize, sharpen, or rotate the image.
- Use the File | Save option to resave the image under the same name and image format.
Use the File | Save As option to resave the image under a new name and/or image format.
- Select the File | Exit option to close the converter window.
 Back to Imagery Menu Summary

RockWare home page