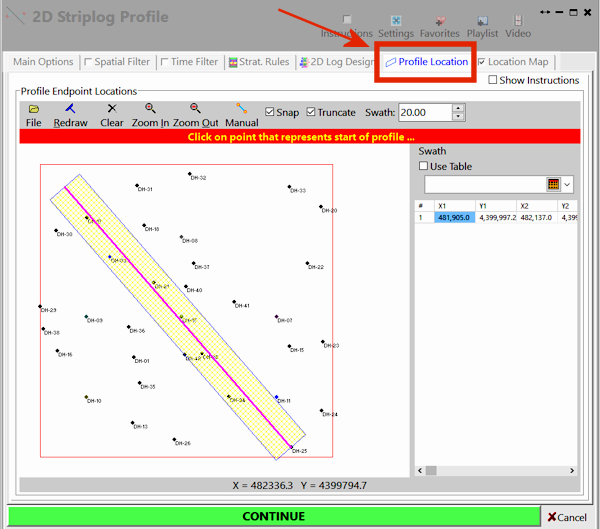
It will display the well locations as a plan-view map, with boring name and symbol color tied to each well. Any previous profile drawn for this project will also be displayed on the map.

Selecting the Profile Location
Importing/Exporting the Profile Location
It will display the well locations as a plan-view map, with boring name and symbol color tied to each well. Any previous profile drawn for this project will also be displayed on the map.
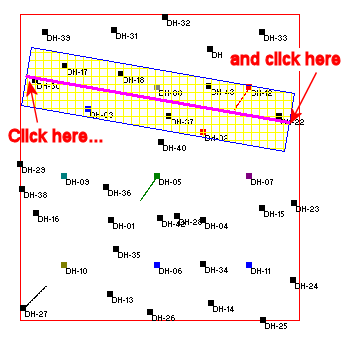
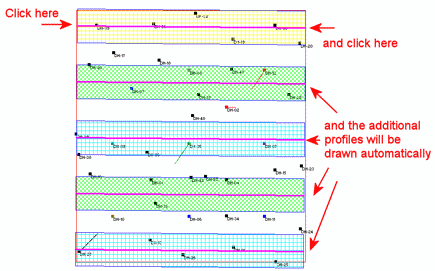
The line can be oriented in the direction of your choice. You may redraw this profile line as many times as you like until you are pleased with its placement. Note that the prompt at the top of the window will prompt you to click on the starting or ending point, to let you know what it's expecting.
 button at the bottom of the window. The program will redraw the window to the original display, including all enabled boreholes.
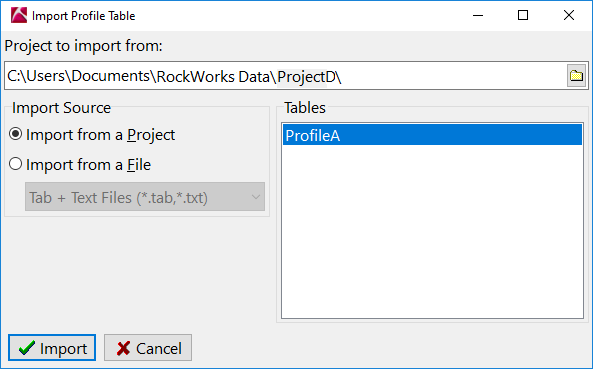
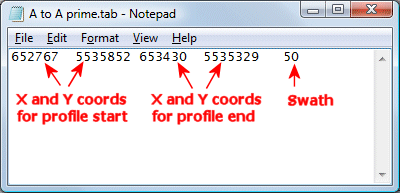
Columns must be separated by Tab characters. The file must be text in format, such as created by Windows notepad.
![]()