 Estimated time: 3 minutes.
If you completed any of the log cross-section lessons in the Borehole Manager section of the tutorial, you can use the ReportWorks program to lay out the sections on a page for printing or inclusion in a report. It’s assumed that you’ve saved the log diagram and the map as RockPlot2D files (.Rw2D).
! If you have not completed those lessons, that’s ok – we’ve included some sample images for you to work with.
- Open a new ReportWorks window: From the main RockWorks menu, select Window | ReportWorks or click on the ReportWorks button on the Home program tab
 .
.
- Set up the page layout:
- Select the ReportWorks File | Print Setup option. You'll see the dimensions of your current printer page.
- Click on the Printer: Select & Set button to view your printer name and options.
- Choose Landscape paper orientation. The options that you’ll see are dependant upon the printer you have on your system.
- Click OK to close the Print Setup window.
- The Page Size settings should correspond with your paper size and layout.
- Click OK to close the Page Setup window.
- Use the View | Fit to Page command if you want to see the entire page in the current window.
- Insert the log section diagram:
- Click on the RockPlot button
 or choose Tools | RockPlot (Rw2D).
- Draw a rectangular area below the profile by defining a square area as shown here:
The program will display a window where you’ll select the .Rw2D file name and set scaling.
- RockPlot (.Rw2D) Tab:
- File Name: Click the small open-file button
 at the upper prompt to browse for the log section you created.
- In the Lithology lesson, the file would be: lith log section.Rw2D.
- In the Stratigraphy lesson, the file would be: straight strat section.Rw2D.
- In the I-Data lesson, the file would be: idata log section.Rw2D.
- In the T-Data lesson, the file would be: toluene log section 2-14-07.Rw2D
- In the P-Data lesson, the file would be: pdata log section.Rw2D.
- If you haven’t done any of those lessons, you can select the factory-installed file: rept_section.Rw2D.
- All of these files would be in the My Documents\RockWorks15 Data\Samples folder.
 Link: Click on this radio button. With this setting, ReportWorks will not store the contents of the cross section in its file. It will instead store the name of the section’s .Rw2D file and path and then read that external file into the page. See the ReportWorks Help messages for the pros and cons of linking versus embedding.
- Scaling: Choose Best Fit. This tells ReportWorks to keep the horizontal (section distance) and vertical (section elevation) scales equal. For your reference the scales that are represented are displayed in the Current View portion of the window, to the right.
- Outline Tab: Click the Outline tab, displayed behind the RockPlot (*.Rw2D) tab.
- Style: Choose None by clicking the down-arrow button.
- Fill (Background) Tab: Click on this tab to set the background appearance.
- Stock Fills: Be sure this option is selected, with the Style to None (for no fill).
- Click the Apply button at the bottom of the window, and you’ll now see your log profile displayed on the page.
- Click the Close button to close the dialog box.
- Feel free to adjust the profile’s position on the layout sheet by clicking and dragging it.
- Insert the log profile map:
- Click on the RockPlot button or choose Tools | RockPlot (Rw2D).
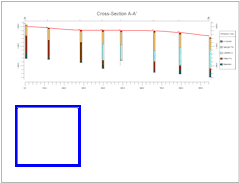
- Draw a rectangular area on the blank page by clicking and holding the mouse cursor in the upper-left corner of the page and dragging down and to the right. Release the mouse button when you’ve got an area drawn line this:
- RockPlot (.Rw2D) Tab:
- File Name: Like before, click the small open-file button at the upper prompt to browse for the map you saved, probably named log section map.Rw2D. If you did not complete any of the profile tutorials, you can browse for the factory-installed rept_map.Rw2D file.
- All of these files would be in the My Documents\RockWorks16 Data\Samples folder.
- Link: Click on this radio button. As above, ReportWorks will read the image information from the external file.
- Scaling: Choose Best Fit. As above, this sets the horizontal and vertical scales equal. For the map, unlike the profile, the horizontal and vertical axes both represent UTM map units.
- Outline Tab: Click the Outline tab, displayed behind the RockPlot (*.Rw2D) tab.
- Style: Choose None by clicking the down-arrow button.
- Fill (Background) Tab: Click on this tab to set the background appearance.
- Stock Fills: Be sure this option is selected, with the Style to None (for no fill).
- Click the Apply button at the bottom of the window, and you’ll see your section map displayed on the page.
- Click the Close button to close the dialog box.
- You can adjust the map’s positioning as you wish.
- Assign a name to the graphic layer: Locate the Layers pane in the upper-left portion of the window. Double-click on the default "Layer 1" name and type in: Tutorial Project and press the Enter key on your keyboard.
- Save this document in progress by clicking on the ReportWorks File | Save option. In the File Name prompt, type in: tutorial and click OK. The program will store this document under the file name "tutorial.RwRpt". The file name extension RwRpt is specific to the ReportWorks program.
 Inserting RockWorks Images
 Back to ReportWorks menu | Next (append a "RwRpt" file)

RockWare home page