RockWorks | Utilities | Grid Editor | Edit | PolyEdit
The grid editor offers a tool for defining a polygonal area and assigning all nodes within it a set Z value. This can be used to note structures such as lake surfaces, pit bases, etc.
Step-by-Step Summary
- Click in the Edit Nodes prompt and choose the Null value or enter the default Real Number Z-value. This is the value that will be assigned to all nodes in the polygon you will draw. You can also right-click on an existing node to set the default Z to that value.
- If you have control points in the main datasheet that you wish to have displayed, use the Plot Control Points tool.
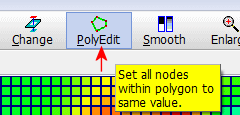
- Click on the PolyEdit button or choose the Edit / PolyEdit menu command.
- Begin digitizing the boundaries of the polygon, being sure to digitize them in order around the perimeter, either clockwise or counter-clockwise. The points you digitize will be displayed in the grid.
- To terminate the polygon, click on the large, red "CLICK HERE TO FINISH POLYGON" button located above the grid display.
- The program will re-assign the nodes within the polygon the indicated value, and this will be reflected by an updated display in the title bar. It will also update the color-coding of the cells as necessary.
- The Grid Editor automatically color-codes the nodes in the model, with pink representing the lowest Z-value and red the highest (a cold-to-hot color scheme). If the Z-value range changes as you edit the model, you may see the color bands change as the automatic colorizing kicks in.
 Back to main Grid Editor topic

RockWare home page