RockPlot3D | File | Export | Collada (dae)
Use this program to save a specific object in the current 3D scene as a COLLADA (.dae) file. You will need to have a separate program which reads COLLADA (COLLAborative Design Activity) files to view the output.
- Only one object at a time can be exported. The choices can be confusing on busy scenes so it's best to turn off items in the scene first.
Menu Options
Step-by-Step Summary
- Collada Filename: Click the small browse button to the right to enter a name for the .DAE file which will be created.
- Texture Filename: Click to enter a name for the texture file which will be generated along with the object. This will contain either the colors or a draped image.
- Coordinates
- Reset XYZ Origins to 0: Check this box if you are using a COLLADA viewer which requires that the object's coordinates be shifted to a 0,0,0 coordinate origin.
- Shading
- Include Normals: Check this box to include normals with your texture file.
- Objects to export: Listed at the bottom of the window will be the visible objects in the current 3D scene. You can choose only one item to export to the DAE file by clicking in its radio button.
Tip: Sometimes it is easier to use the RockPlot3D data check-boxes to hide the objects you don't want to export, so that only the visible item is available in the export window.
- If necessary, open the RockPlot3D Scene (Rw3D file) you wish to export. (See Opening a RockPlot3D View.)
- Use the RockPlot3D data check-boxes to turn on/off the items in the scene which are/are not to be exported. Only visible items will be available for export selection, and only one object at a time can be exported.
- Select the File | Export | Collada (dae) menu option.
- Enter the requested menu options, described above.
- Click OK to proceed.
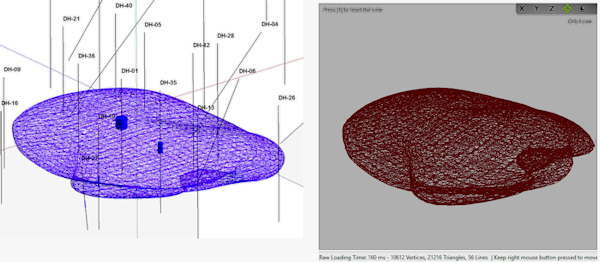
The program will build a DAE file representing the selected object in your 3D scene, and a texture file with the item's color. These files can be loaded into any program that reads COLLADA files.
 Back to Exporting Images

RockWare home page