RockPlot3D - Animations | Reveal
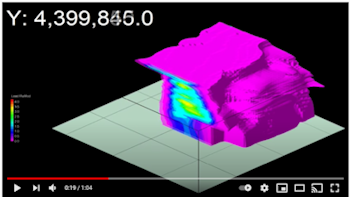
Use this program to create an animated view of a 3D solid model, automatically removing voxel layers in a sequential fashion (and optionally replacing them), along one or more axes. The number of steps in the animation will depend on the number of voxel layers along the requested axes, and the number of axes requested. As with other RockWorks animations, the individual frames of the movie are saved as PNG files in the Animation_Frames subfolder of your current project folder, using a specified name prefix.
! Note that this program animates solid voxel and isosurface entities only.
 Watch Video: https://www.youtube.com/watch?v=QfBMJPQxLuo
See also
Animate | Solid Reveal for a stand-alone, scriptable version of this program.
Menu Options
Step-by-Step Summary
- Reveal Options: Use this tab to define the axes along which the layers are to be removed/replaced, the direction, and the sequence. You can define up to 12 steps.
- Order: Insert a check in these boxes, 1 -> 12, to activate a slice removal (reveal) sequence.
- Bounce: If the layers are to be replaced in the opposite direction, check this box. For example, if you activate sequence #1 as a Top --> Bottom and want it to bounce back and rebuild from the bottom --> top, check the Bounce option.
- Direction: For each activated sequence (1 -> 12) select the reveal direction by clicking on the down-arrow (v) and choosing an option from the popup list.
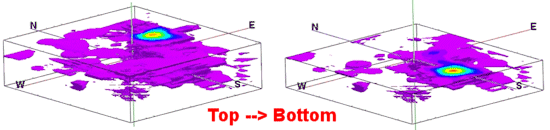
- Top --> Bottom: Choose this to set the layer removal from the top of the diagram to the bottom. ("Brounce" would rebuild from the bottom to the top.)
- Bottom --> Top: Choose this to set the layer removal from the bottom of the diagram to the top. (Bounce would rebuild from the top to the bottom.)
-
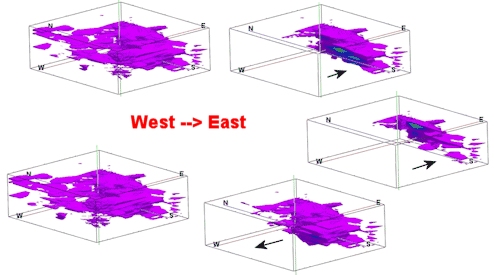
- East --> West: Choose this to set the layer removal from the east side of the diagram to the west. (Bounce would rebuild from the west to the east.)
- West --> East: Choose this to set the layer removal from the west side of the diagram to the east. (Bounce would rebuild from the east to the west.)
-
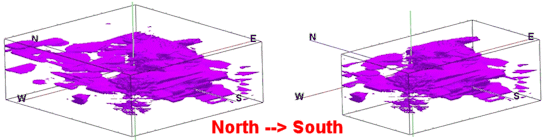
- North --> South: Choose this to set the layer removal from the north side of the diagram to the south. (Bounce would rebuild from the south to the north.)
- South --> North: Choose this to set the layer removal from the south side of the diagram to the north. (Bounce would rebuild from the north to the south.)
-
- Output Options: Use these settings to define the animation output file type and display settings. (More info)
- If necessary, create or open the RockPlot3D scene (Rw3D file) you wish to export. (See Opening a RockPlot3D View.)
- Adjust the image view to your satisfaction. This includes, but is not limited to, the rotation angle, zoomed-in state, vertical exaggeration, window size, and model filtering. Keep in mind the size of the output video window you will be using when you set the RockPlot3D window size.
- Click on the Animations | Reveal menu option.
- You should see the name(s) of the solid model(s) contained in the current scene. Click on the one you wish to animate.
- Enter the requested menu options, described above.
- Click Continue to proceed.
The program will build the animation per the settings you've requested, in background memory.
! The view will not re-render for the animation production - all you'll see on the screen is the lower status bar changing as the layer views are generated.
! This process can be slow, depending on the resolution of your model and the number of axes requested.
The completed movie will be stored under the requested file name. If you've requested Autoplay, the movie will be loaded into your default video player.
 Back to Creating Animations

RockWare home page